> ## Documentation Index
> Fetch the complete documentation index at: https://pentest-tools.com/docs/llms.txt
> Use this file to discover all available pages before exploring further.
# Cloud
> Deploy the VPN agent in AWS or Azure cloud environments
You can deploy the VPN agent directly in your cloud environment to scan resources inside your VPCs and virtual networks. Both AWS and Azure are supported through their respective marketplaces.
VPN profiles require the **Internal network scanning** add-on.
## Deploying on AWS
The VPN agent is available as a pre-configured AMI on the AWS Marketplace.
Go to the [Pentest-Tools.com VPN Agent on AWS Marketplace](https://aws.amazon.com/marketplace/pp/prodview-647574sstaf66) and click **View purchase options**. If it's the first time you are configuring the AWS VPN Agent, you have to **Subscribe**. If else, go directly and **Launch your software.**
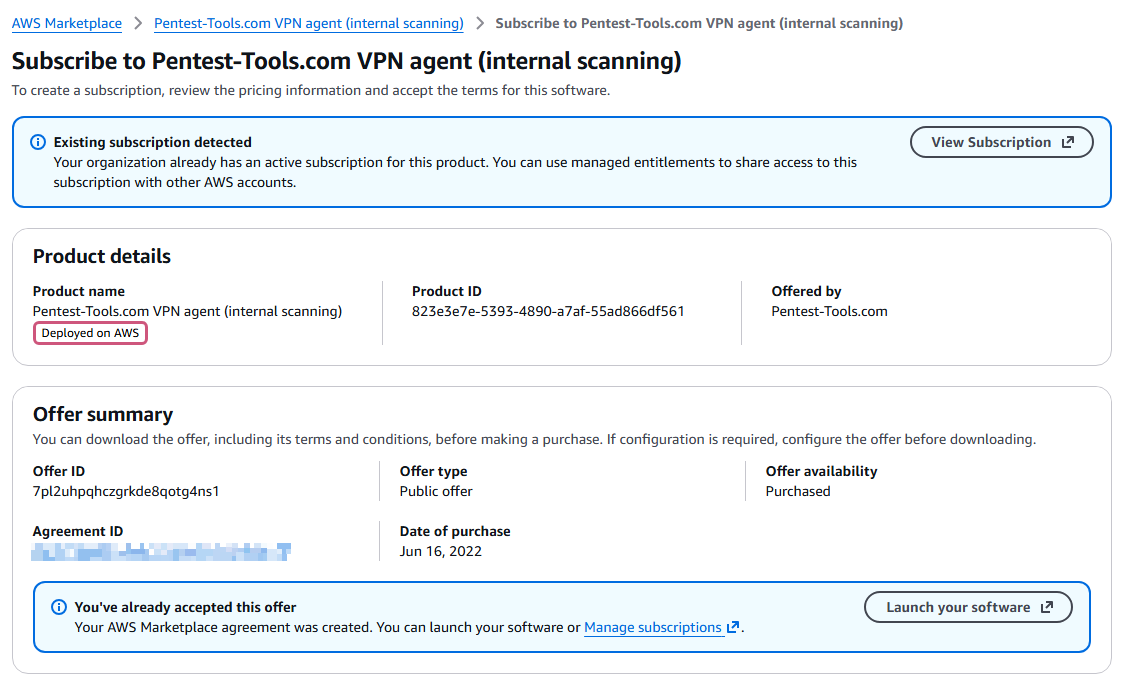
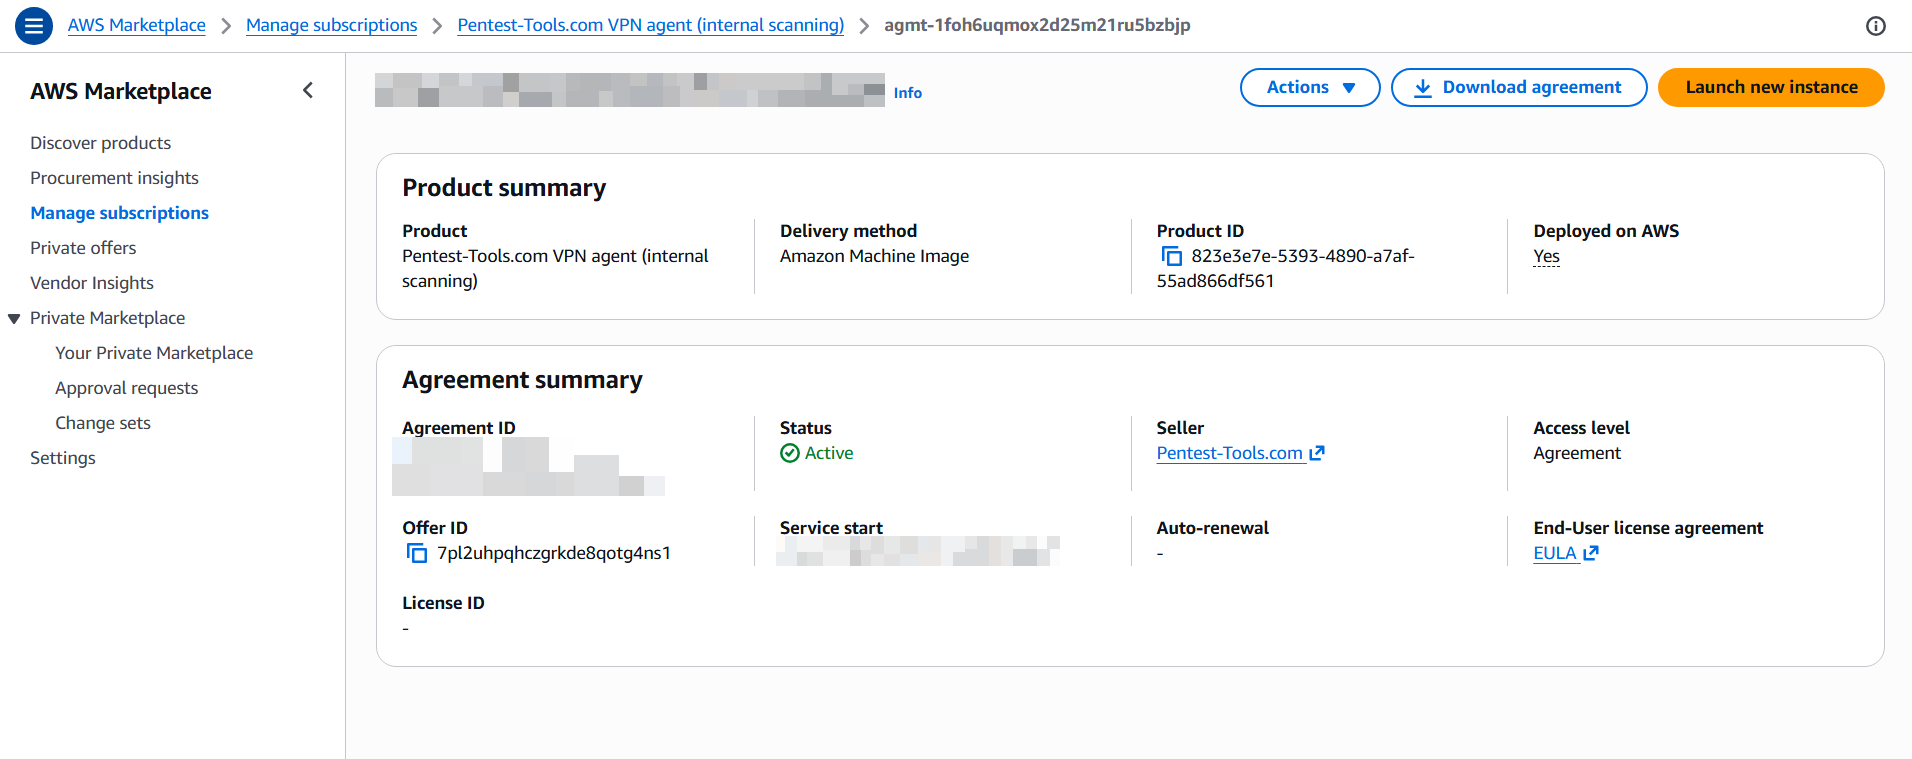
You will be redirected to the agreement screen (TBD name in aws). From here, you need to **Launch new instance.**
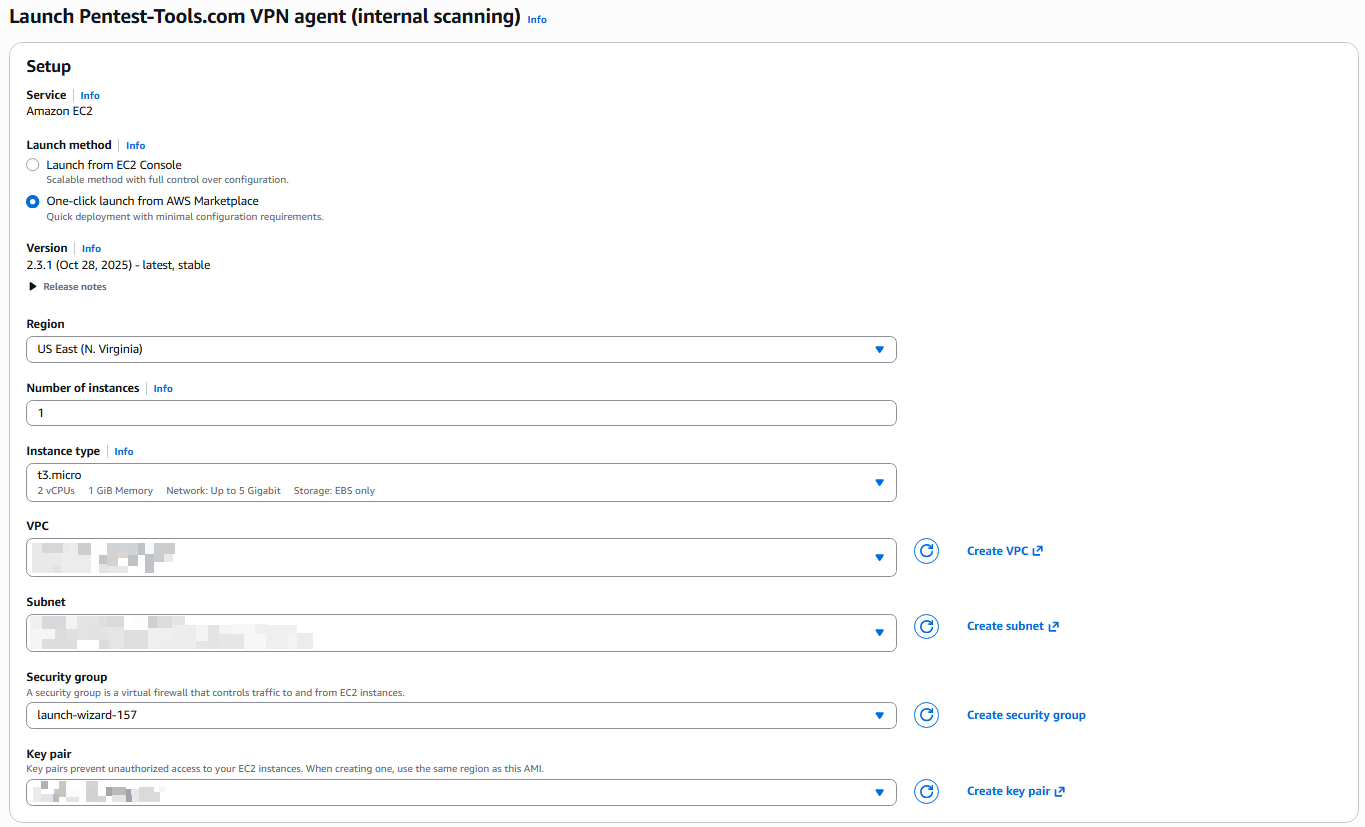
We recommend using **One-click launch from AWS Marketplace**. Choose your instance type (t3.micro or larger) and select the VPC and subnet where your targets are located.
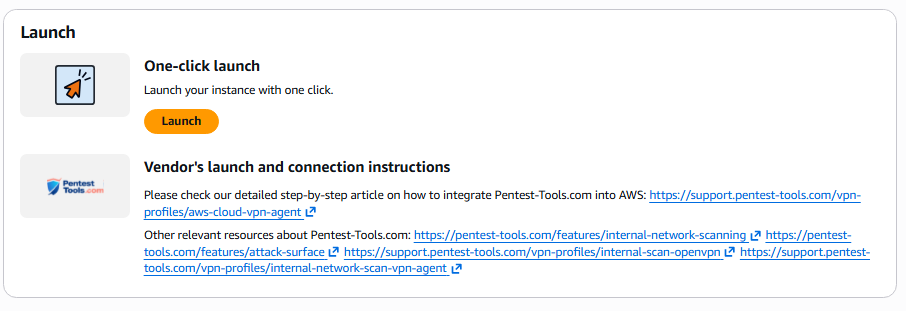
After the setup is done, click **Launch**.
The agent only needs outbound TCP port 22 to `vpn2.pentest-tools.com`. No inbound ports are required, though you may want SSH access (port 22 from your IP) for management.
SSH into the instance via your terminal as `ubuntu` using your key pair. An interactive prompt asks for your VPN UUID (found on the [VPN Profiles](https://app.pentest-tools.com/vpn_profiles) page). Enter the UUID, and the agent starts automatically.
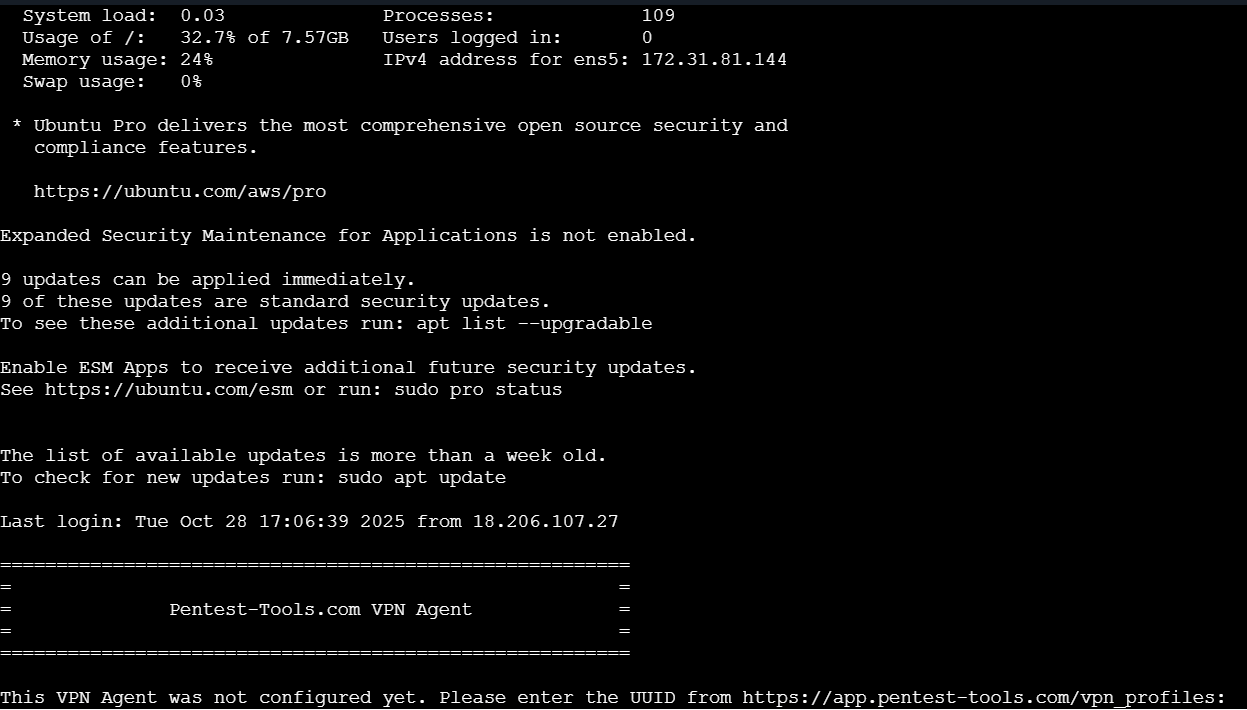
SSH access is removed from the instance after initial setup. Complete all network or OS-level configuration before entering the VPN UUID.
Check that your VPN profile shows as **Online** in the dashboard.
### Instance recommendations
| Specification | Recommendation |
| ------------- | ------------------ |
| Instance type | t3.micro or larger |
| Storage | 10 GB gp3 |
### Multi-VPC scanning
To scan resources across VPCs, you can use VPC Peering or Transit Gateway to route traffic, or deploy a separate agent in each VPC.
## Deploying on Azure
The VPN agent is available on the Azure Marketplace.
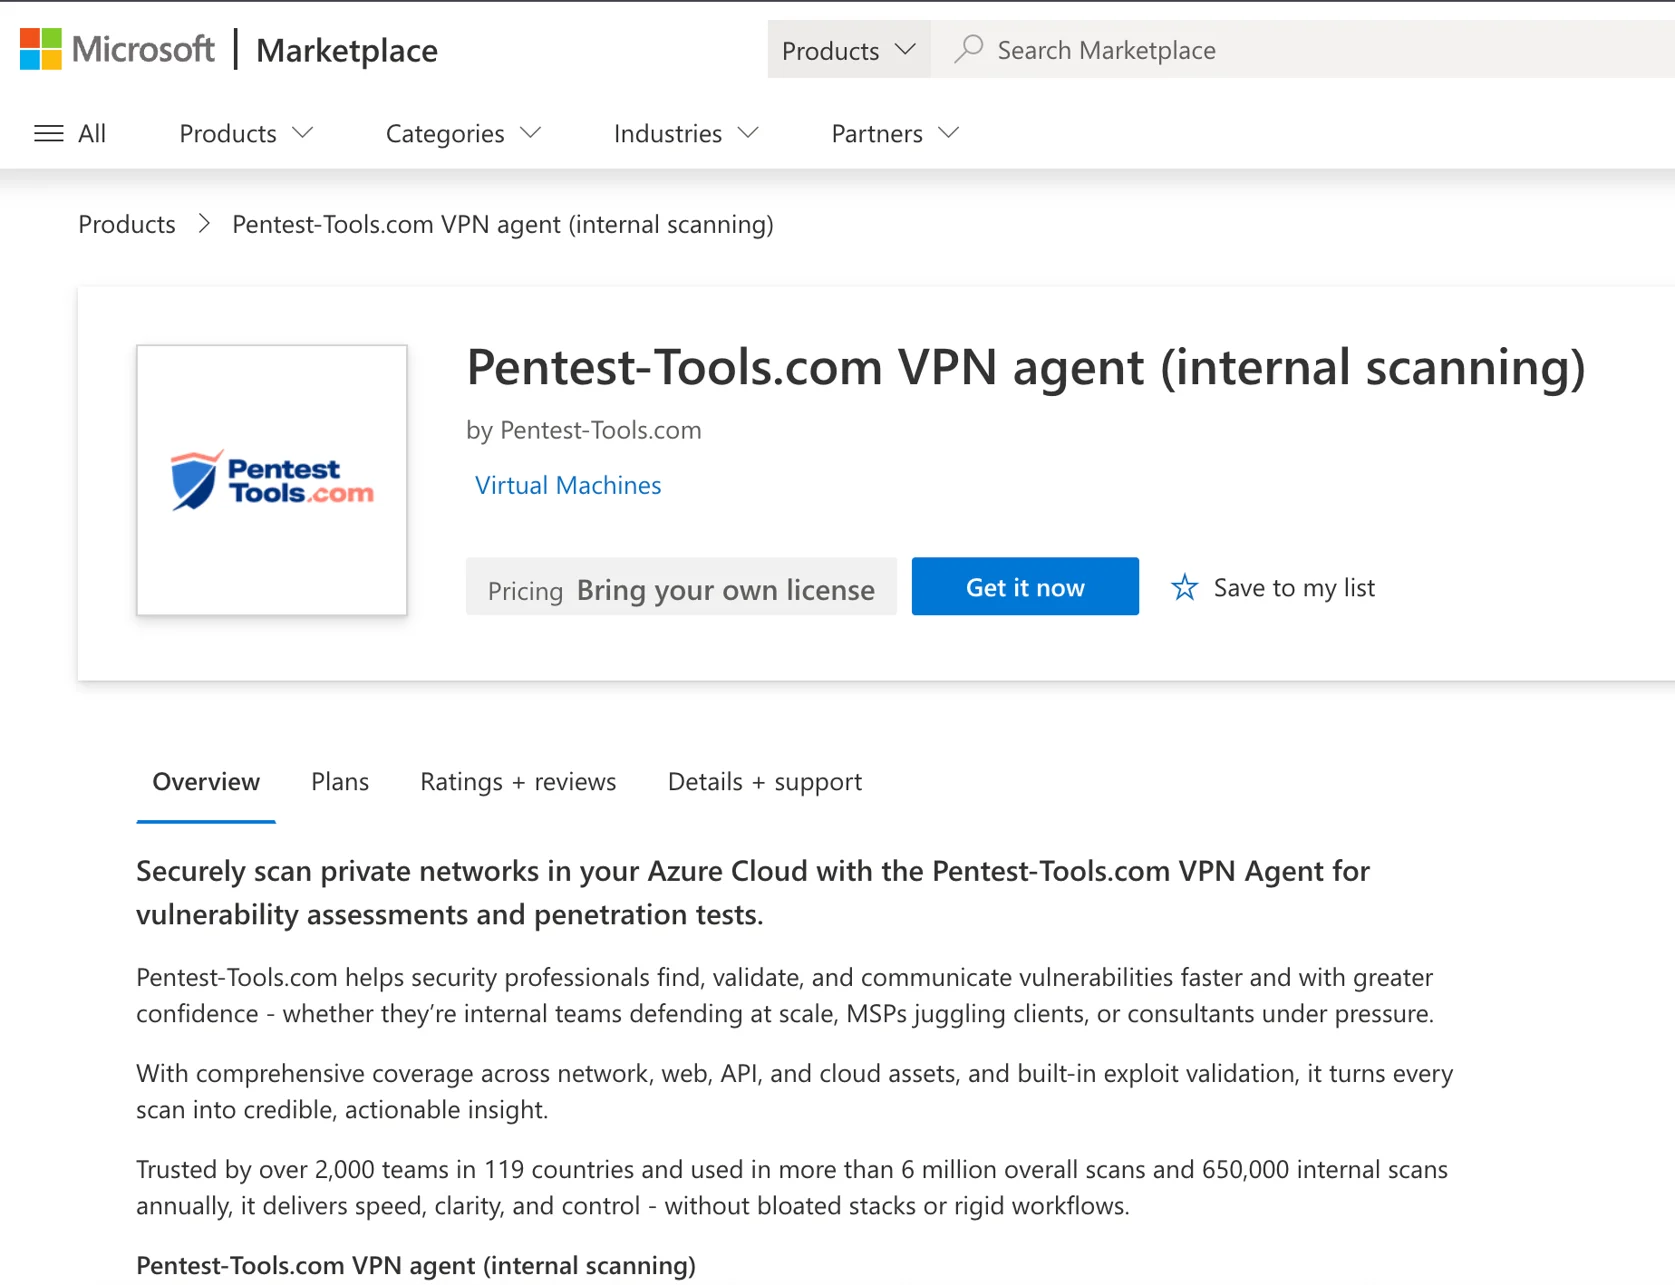
Go to the [Pentest-Tools.com VPN Agent on Azure Marketplace](https://marketplace.microsoft.com/en-us/product/virtual-machine/pentest-tools.pentest-tools-vpn-agent?tab=Overview) and click **Get it now**.
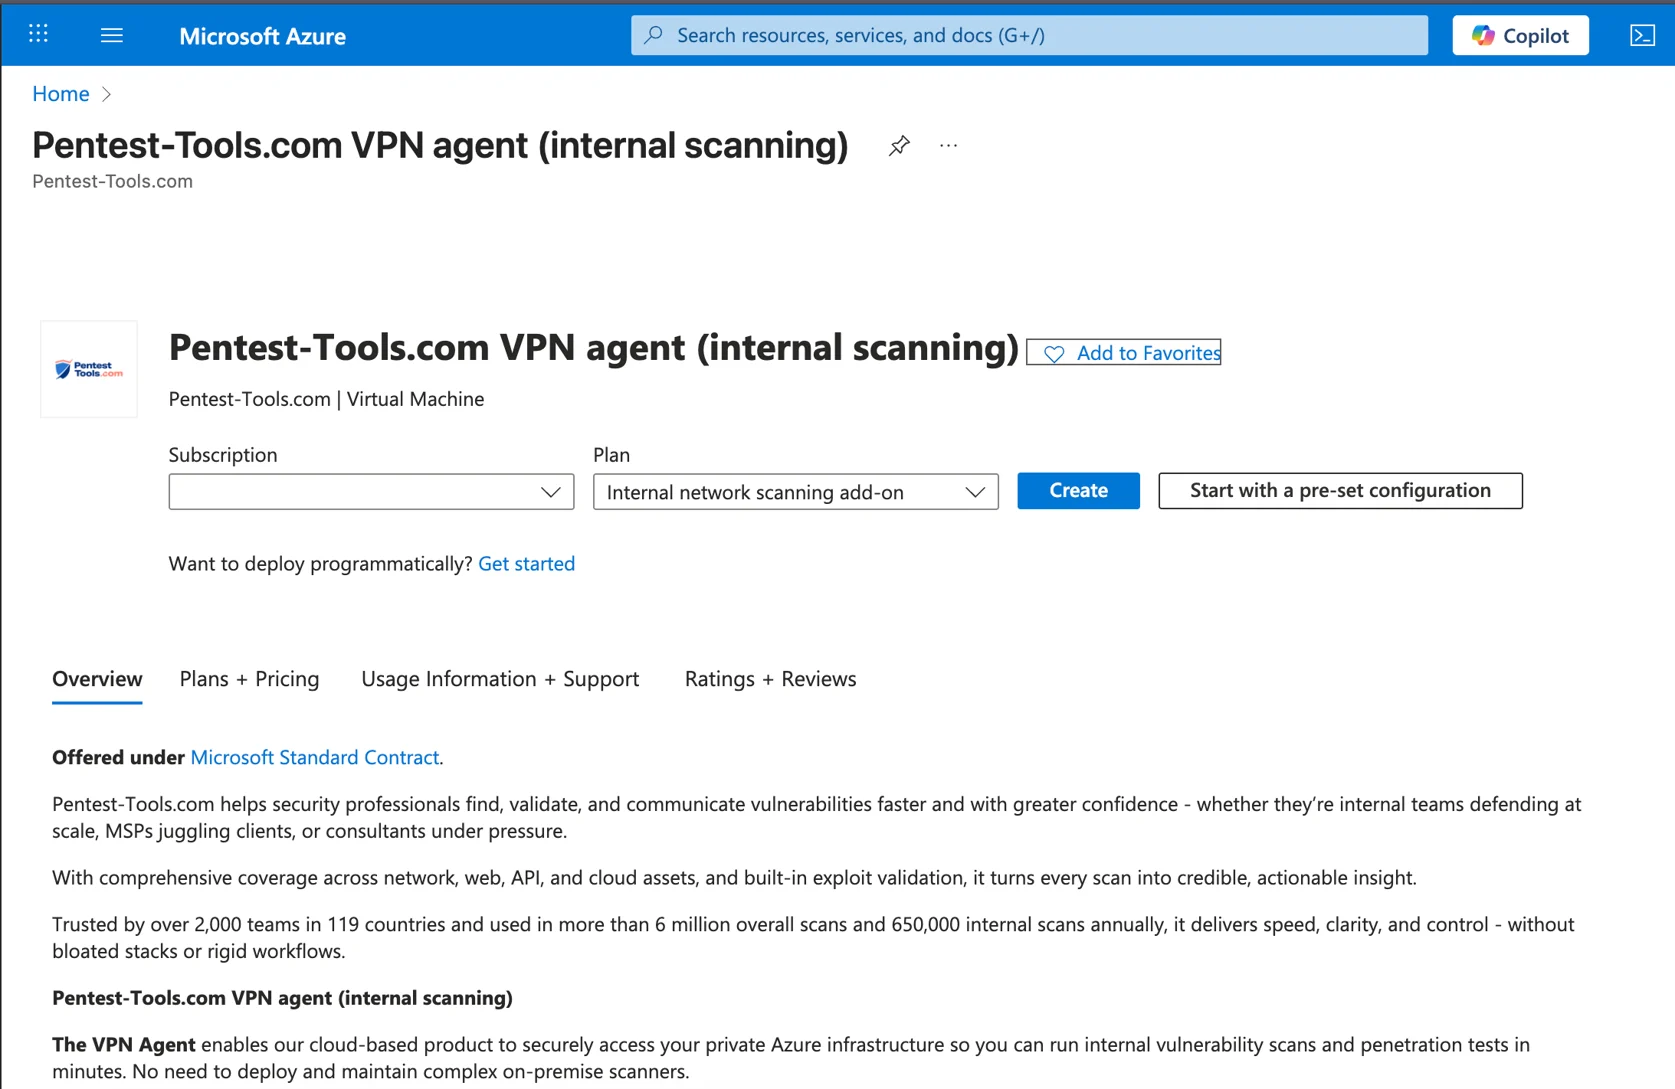
In the configuration page of the Pentest-Tools.com VPN agent you have to click on **Create.**
Select the virtual network and subnet where your targets are located. Standard\_B1s or larger is sufficient. We recommend the following settings:
* Add a **Resource group** (replace the "**vpn-agents**" example in the screenshot with your a resource group on your own account)
* Set a name for your virtual machine in the **Virtual machine name** field
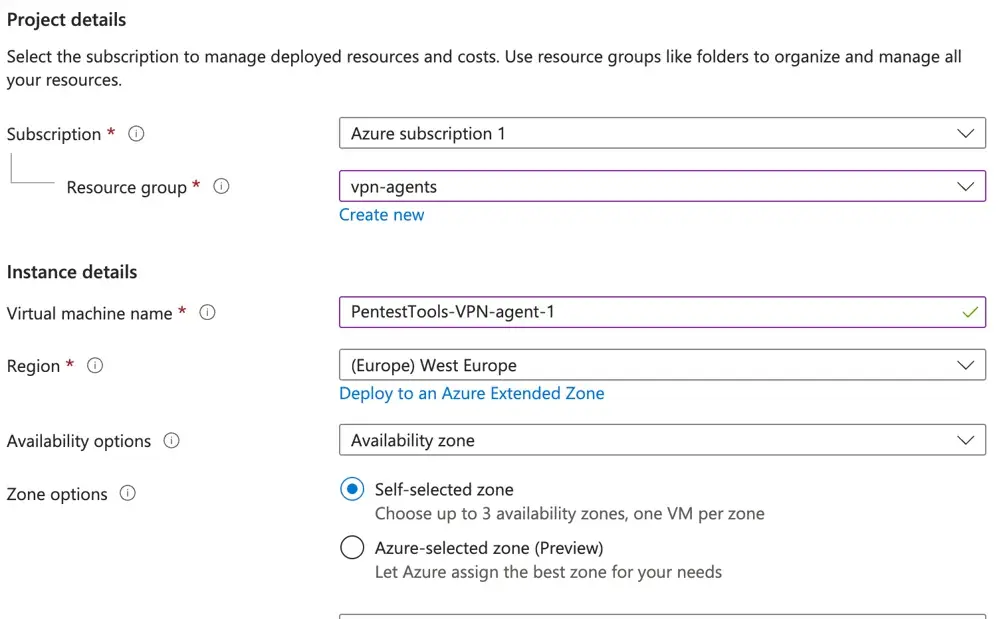
* Choose your region, availability and zone options, availability zone
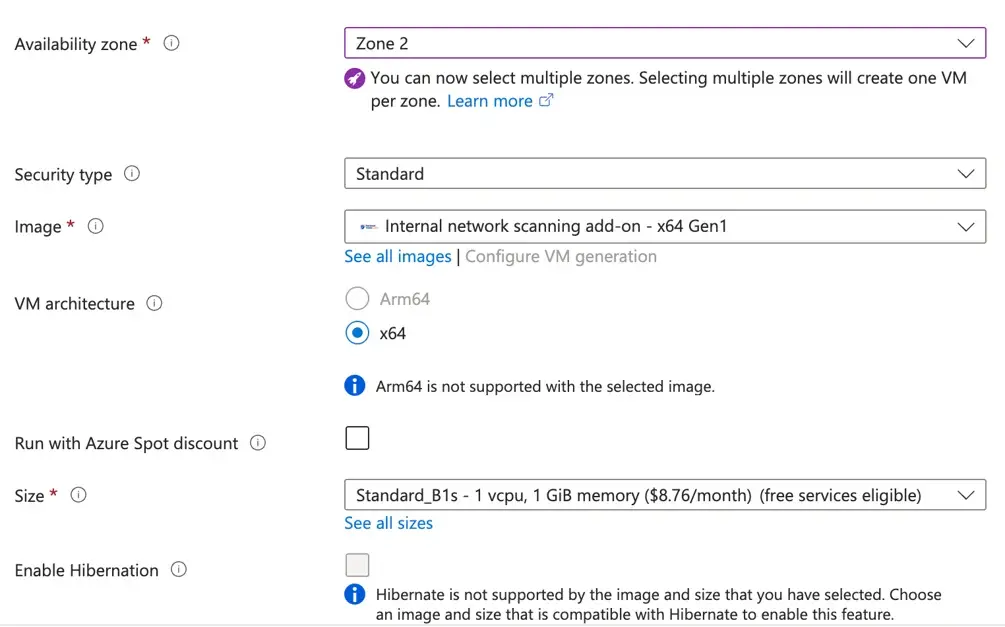
* In the **Username** field, change the value from "azureuser" to "ubuntu"
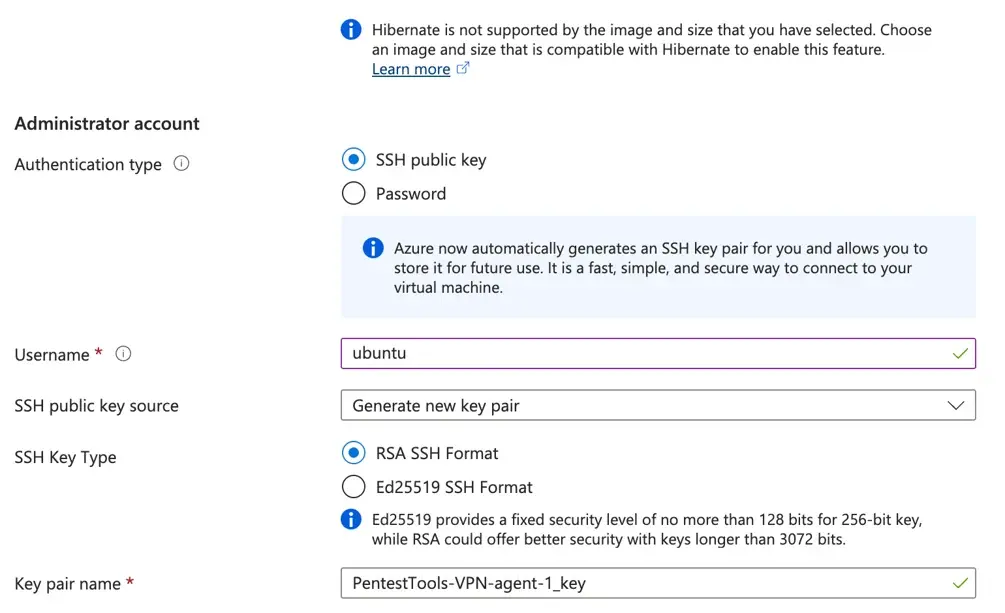
* Generate a new key pair or use an existing one
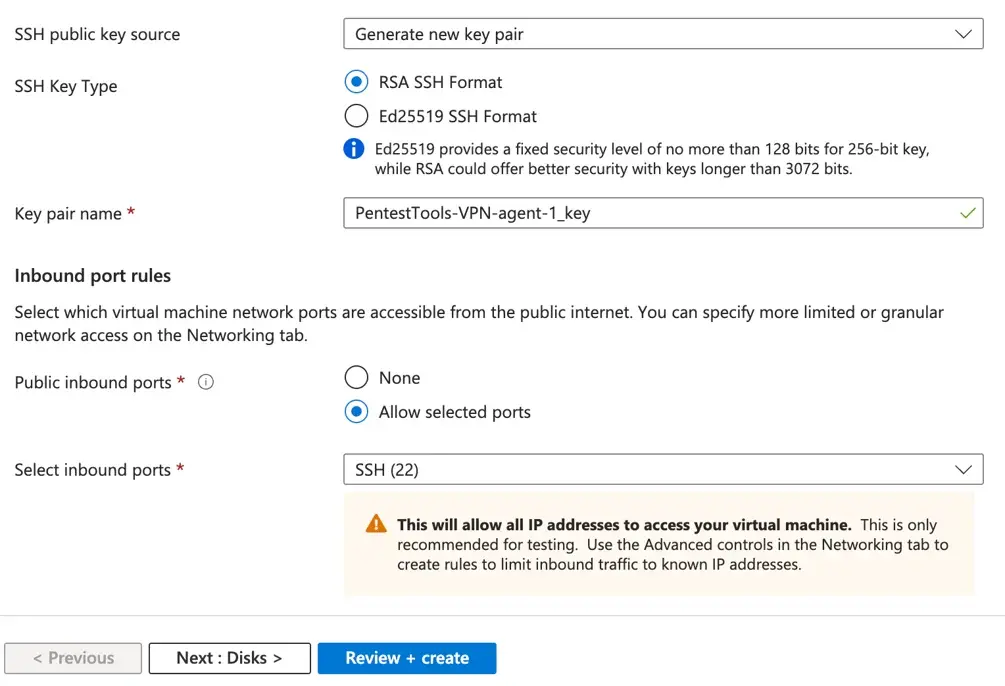
All the other options can be left as default.
SSH into the VM as `ubuntu` using your key pair. An interactive prompt asks for your VPN UUID (found on the [VPN Profiles](https://app.pentest-tools.com/vpn_profiles) page). Enter the UUID, and the agent starts automatically.
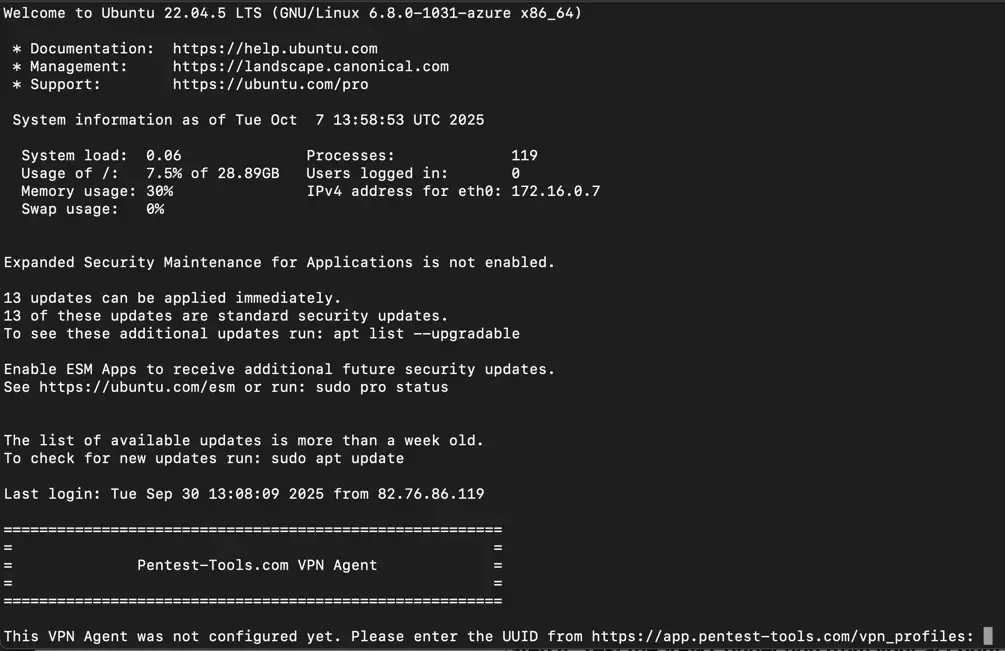
SSH access is removed from the VM after initial setup. Complete all network or OS-level configuration before entering the VPN UUID.
Check that your VPN profile shows as **Online** in the dashboard.
### VM recommendations
| Specification | Recommendation |
| ------------- | ----------------------- |
| Size | Standard\_B1s or larger |
| Disk | 32 GB Standard SSD |
### Multi-VNet scanning
To scan across virtual networks, set up VNet peering, or deploy a separate agent in each VNet.
You can also deploy the VPN agent using the [Docker image](/docs/capabilities/vpn/docker-agent) on any cloud VM instead of using the marketplace images. The marketplace images are pre-configured.
## Related topics
* [VPN profiles overview](/docs/capabilities/vpn/overview)
* [Docker agent](/docs/capabilities/vpn/docker-agent)
* [Troubleshooting](/docs/capabilities/vpn/troubleshooting)