

What are Scan Robots?
Scan Robots are predefined workflows that run multiple security tools in sequence. Each robot defines a series of scans where output from one tool feeds into the next. You choose a target and start the robot, then review the results. Robots can be shared with team members. See Sharing robots for details.Default robots
Starting November 3, 2026, these six robots replace the previous default robots:Robot workflows
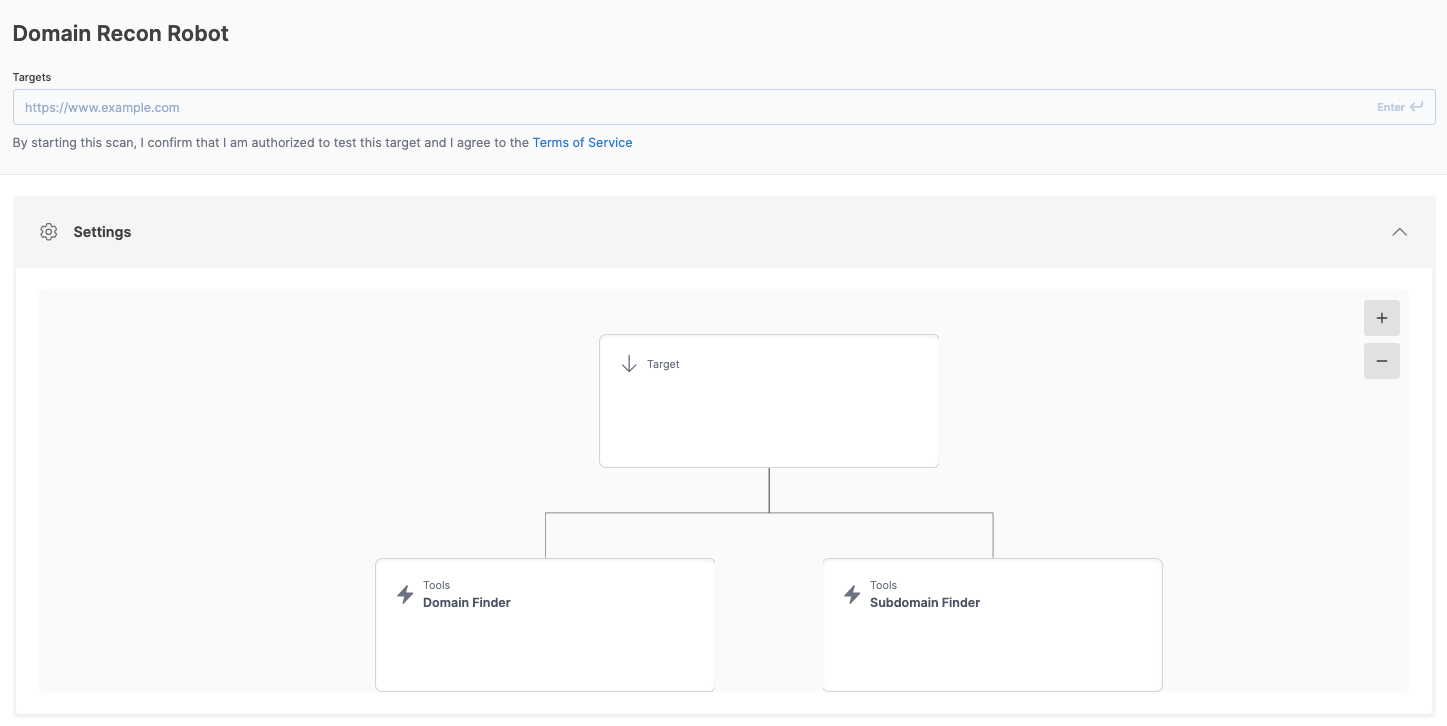
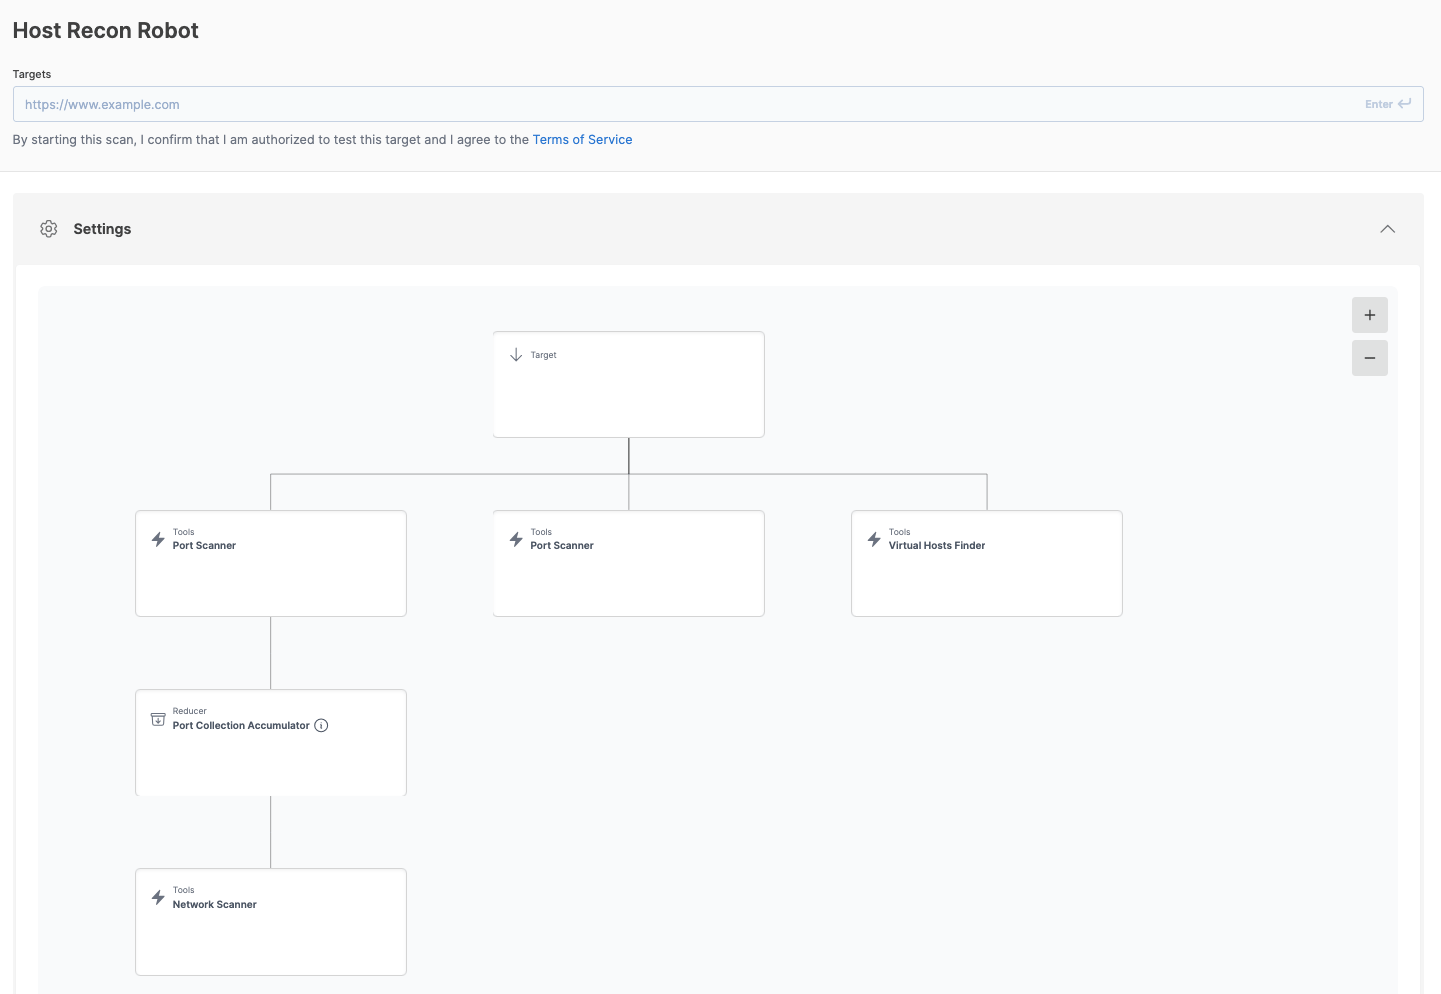
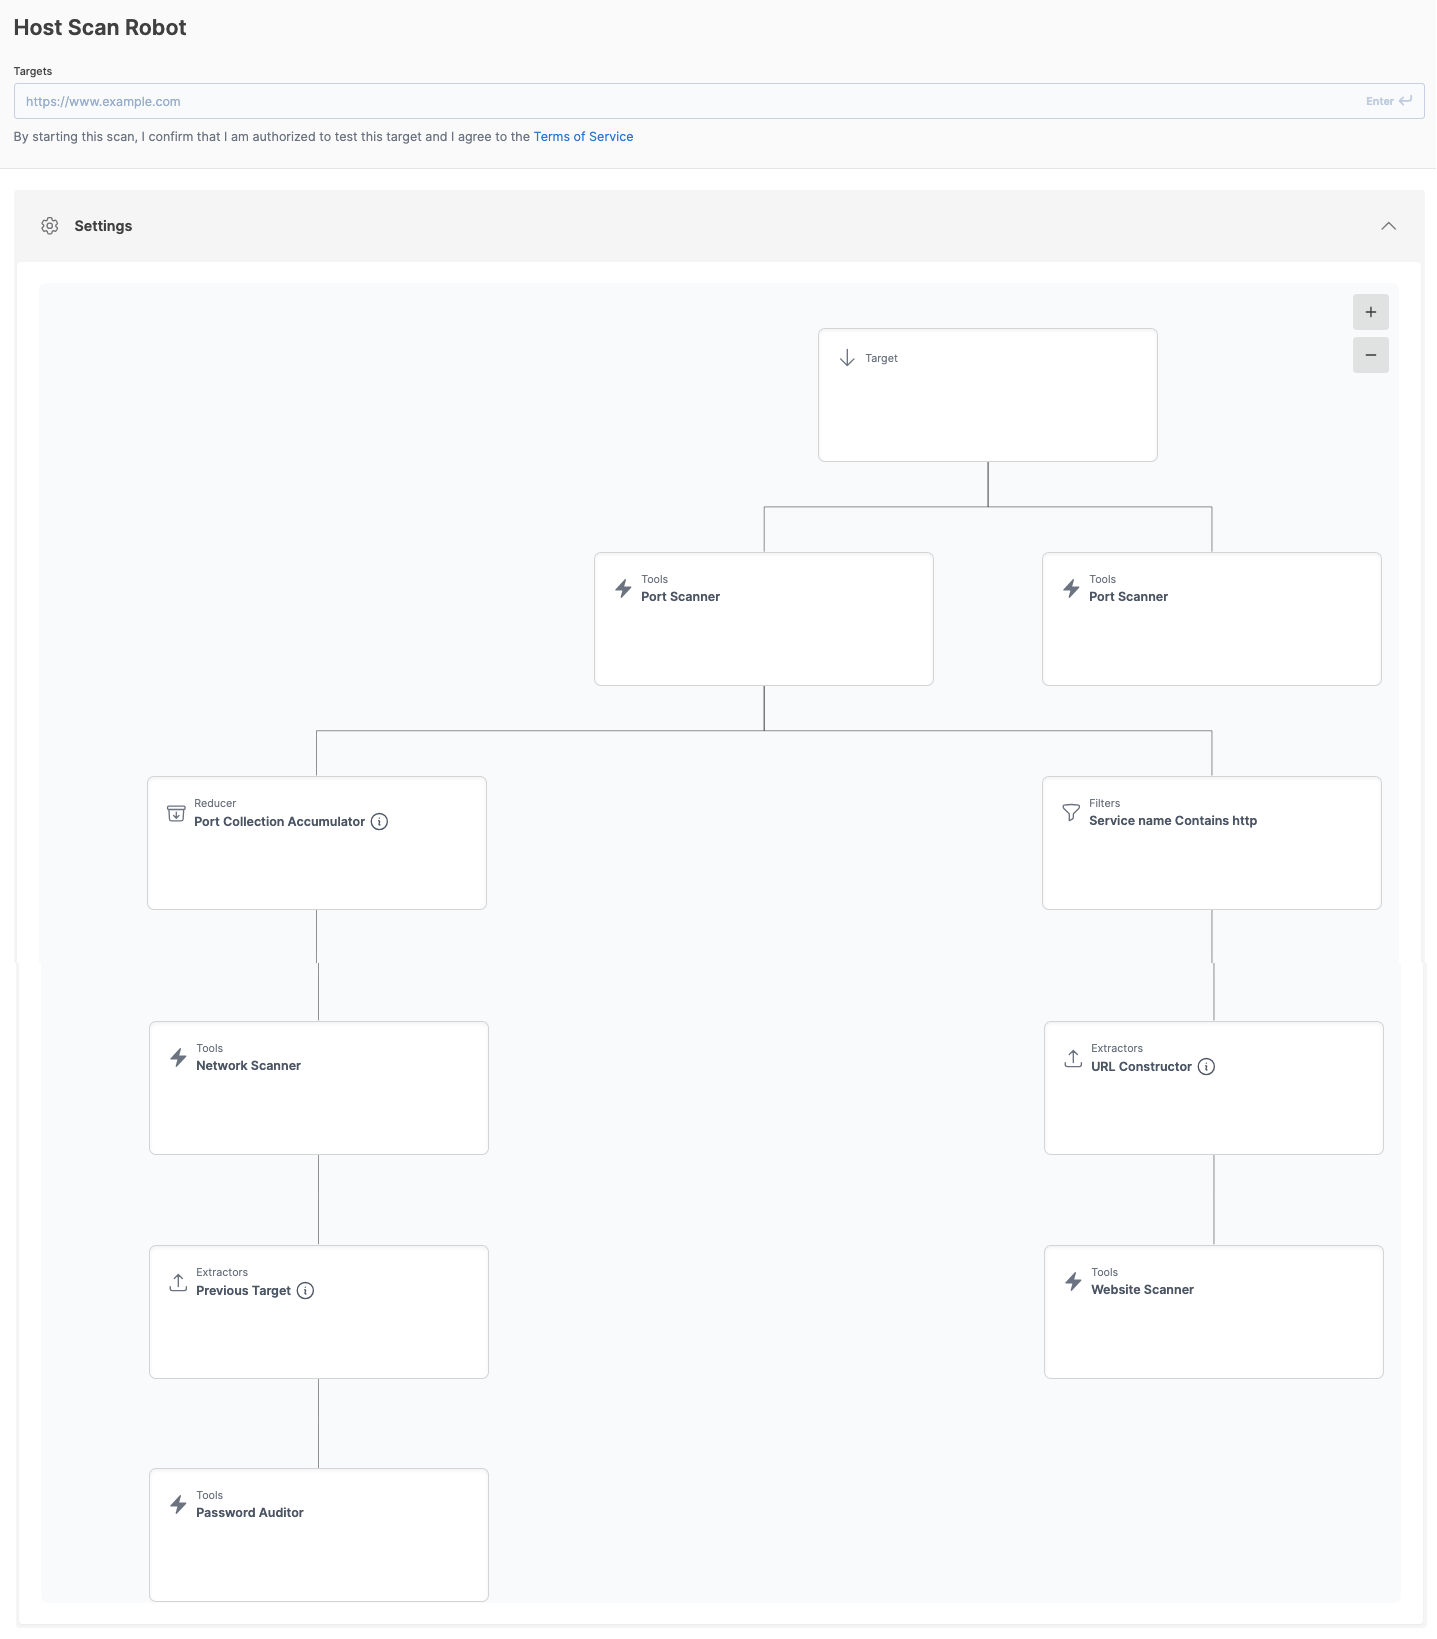
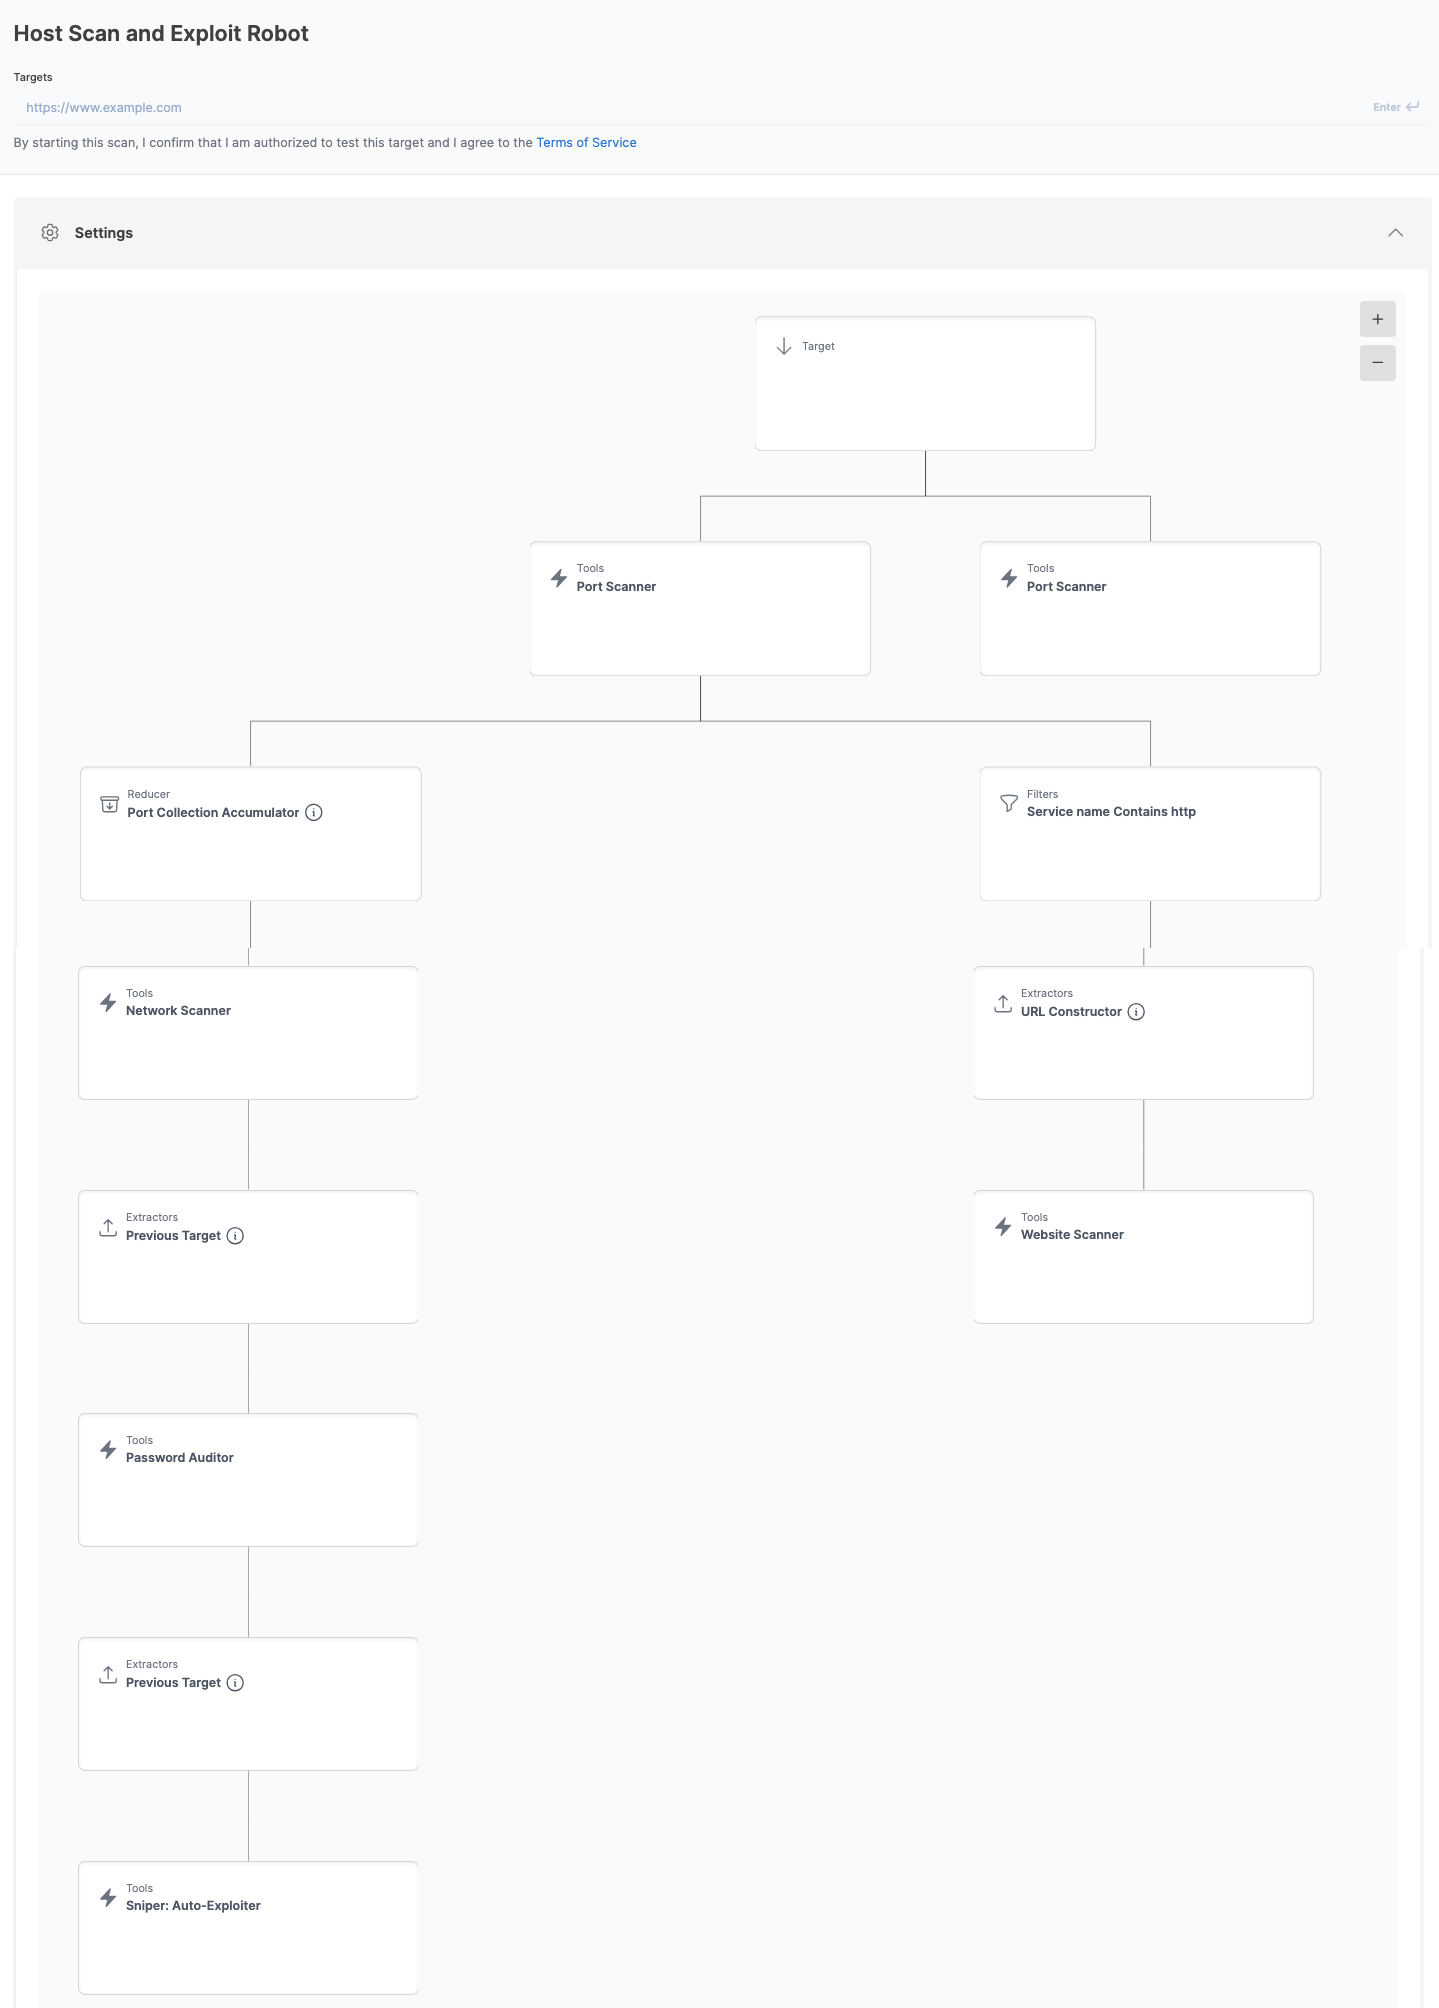
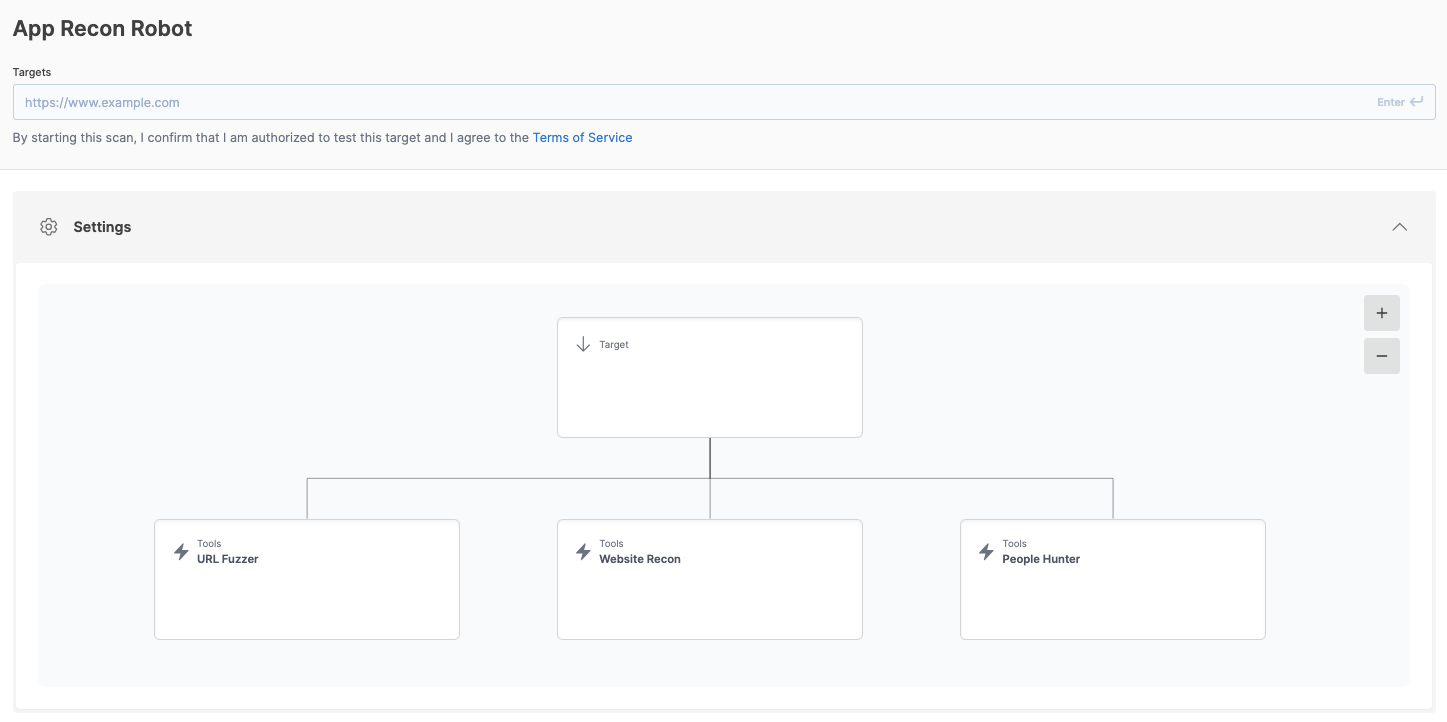
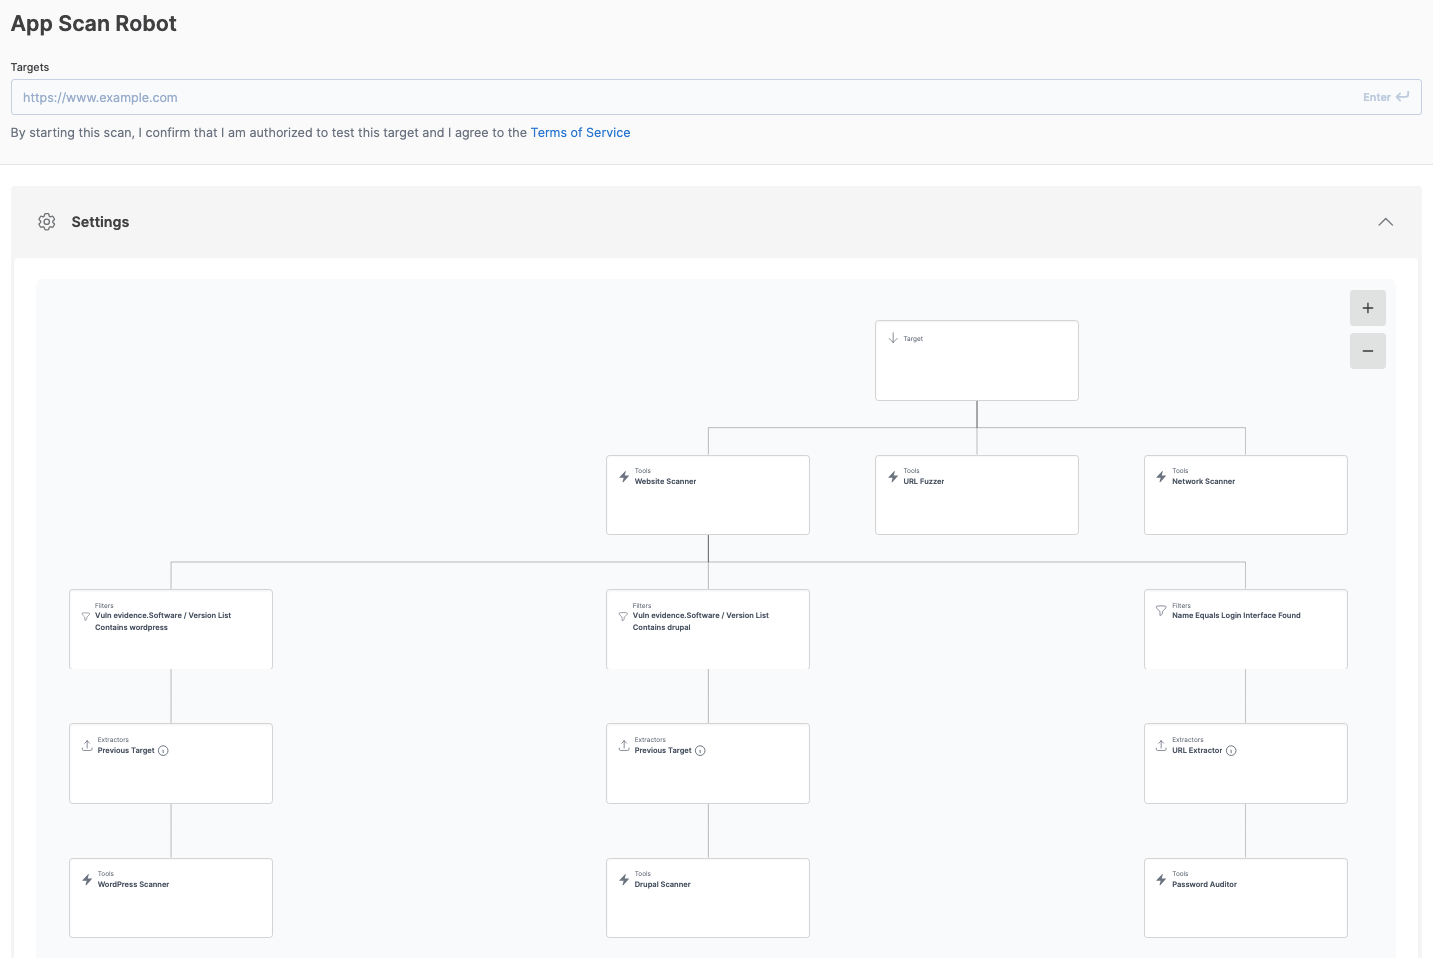
Running a robot
1
Navigate to Robots
Go to Automation > Robots in the main navigation.
2
Select a robot
Click on a robot to view its description and workflow.
3
Start a new scan
Click New scan and select the target you want to scan. Each robot works on one target per run.
4
Configure and run
Review the configuration and start the robot.
Scheduling robots
Robots can run on a schedule:1
Start a new scan
Click New scan on any robot.
2
Enable scheduling
Toggle the scheduling option and configure:
- Frequency: how often the robot should run (once, daily, weekly, monthly, quarterly, yearly)
- Start date: when to begin the schedule
3
Save schedule
The robot will run automatically at the configured intervals.
Scheduled robot scans appear in your Scheduled Scans list, where you can manage, disable, or delete them.
Managing robots
Viewing robot details
Click on any robot to see:- Description of what the robot does
- The workflow and tools it uses
- Available actions depend on your permissions.
Editing robots
You can’t create new robots or edit existing ones. Robots you created earlier stay in your account with their scan history.Deleting robots
Deleting a robot removes the robot configuration. Past scan runs are not deleted. They remain on the Scans page but show “[Robot deleted]” as their name. To remove a past run, delete it from the Scans page.Robot execution
Tools run in the order the workflow defines, and some steps run in parallel. Some robots include filters that control which results trigger subsequent steps.Node types
The workflow diagram has four node types:- Tool runs one or more scans. Shows status and finding counts as work progresses.
- Filter tests conditions against each result from the previous tool. Only matching results move to the next step. The node shows how many results passed through.
- Extractor pulls new targets out of a tool’s results to feed the next tool. For example, it might pull hostnames from Subdomain Finder results, or build URLs from a port scan’s list of open HTTP ports.
- Reducer works like an extractor, but processes all scan results together before producing targets. Its primary use is deduplication: when Subdomain Finder returns multiple subdomains that resolve to the same IP, a reducer picks one hostname per IP to avoid scanning the same server twice.
Monitoring progress
The scan result page shows the robot workflow as an interactive diagram. Each node updates as the robot runs. Tool nodes show the tool name, a status indicator, and finding counts by severity. When scans start for that step, a “X / Y Finished Scans” button appears. Click it to open a panel listing each individual scan with its target, status, and finding summary. From that panel, click any scan to open its full result in a new tab. Scans that failed to start appear in the same panel with their error message. You can pan the diagram by clicking and dragging. Use the + and − buttons to zoom.Results
When the robot finishes, the diagram shows the final state with finding counts at each tool step. To see findings in detail, click the Finished Scans button on any tool node to open individual scans from that step.Scans and reports
Each robot run appears as a single entry on the Scans page. The individual tool scans that run in the background are hidden from the list. When all tools finish and you have email notifications configured, you get one email notification with an aggregated PDF report attached. The report is also saved to the Reports page. Configure notification rules on the Notifications page. Deleting a robot run from the Scans page removes the entire run and all its child scans. No warning is shown before this happens.Example use cases
Sharing robots
You can share robots with team members. Shared robots appear alongside default robots so they can run them on their own targets.Permission levels
How to share robots
- Go to Team in the sidebar
- Select the team members you want to configure sharing for
- Click Share
- Set the Robots permission level
- Click Save
Best practices
Start with default robots
Start with default robots
Start with Domain Recon Robot on a domain you own, review what it discovers, and choose which hosts need deeper testing.
Watch your scanned assets quota
Watch your scanned assets quota
Each robot works on one target per run, and each unique target you scan counts against your scanned assets limit. After a recon robot lists subdomains, choose which ones to scan.
Use scheduling for monitoring
Use scheduling for monitoring
Set up recurring robot runs to repeat the same checks on a schedule.
Test on non-production first
Test on non-production first
Verify robot behavior on test assets before running against production systems.