Work smarter, not harder: 5 updates to enhance automation

- Article tags
It’s been an intense month and we’re excited to share the news!
These 5 platform improvements are all about saving you time and energy, so you can focus on your most important tasks:
Create custom wordlists (and use them with URL Fuzzer)
Ignore dead targets and exclude them automatically
Manage scheduled scans by specific workspace from Scheduler
Configure & run authenticated scans straight from Targets
Network Vulnerability Scanner with OpenVAS now includes the SMBGhost and GhostCat scanners
Let’s unpack them!
1. Set up your own list of words and use them with the URL Fuzzer
In addition to the available default wordlists, you can now create, define, and group your own list of words from your Pentest-Tools.com account.
To enable it, go to Wordlists, select Add, and start creating the wordlists you need to run specific security testing assessments.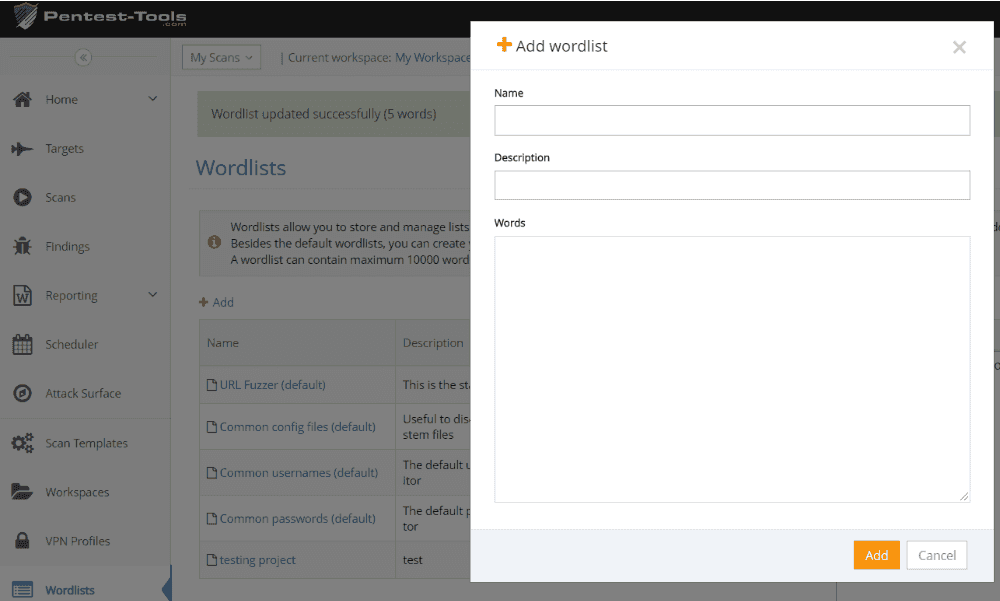
For each list, make sure to include 10.000 words at most, where one word is under 200 characters.
After your custom wordlist is created, go to URL Fuzzer, insert your URL target, and run a scan with your customized wordlist(s).
Will you…?
Yes, we’ll add support for other tools in the next updates!
Use these custom wordlists to create specific lists for individual targets, to support new languages, or simply to make your pentesting work faster and easier.
Create your first custom wordlist
2. Automatically exclude dead targets from internal network scans
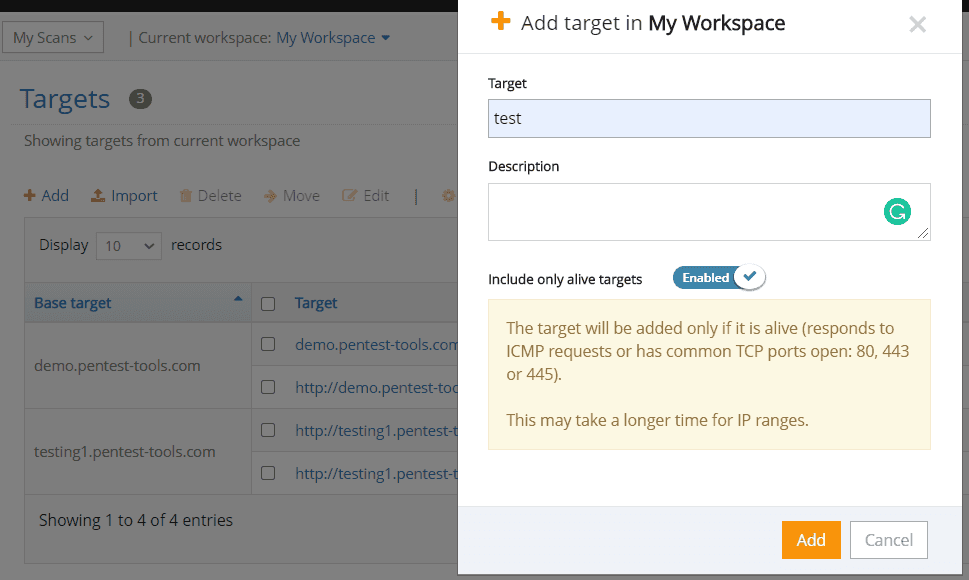
When you want to add or import a new target, there’s a simpler way to ignore the dead host targets and run more accurate scans.
To do this, go to Targets, select Add, and enable the Include only alive targets option. This only adds the targets that respond to ICMP requests and have common TCP ports open (80, 443, or 445).
If you run internal network scans and you need to add specific IP ranges to scan only the relevant targets, this makes it much easier!.
Keep your results fresh and kickin’!
3. Manage scheduled scans by specific workspaces from one view
We’ve enhanced the Scheduler so you can better manage your scheduled scans for a single view!
See all your scheduled scans by specific workspaces or for ALL your workplaces. Sort, edit, download the latest results, and keep the testing flow going!
Go to Scheduler, click on View Settings, enable “Show scans for all workspaces”, and you’re all set!

4. Configure scan authentication right from the Targets page
Do you spend a lot of time in Targets?
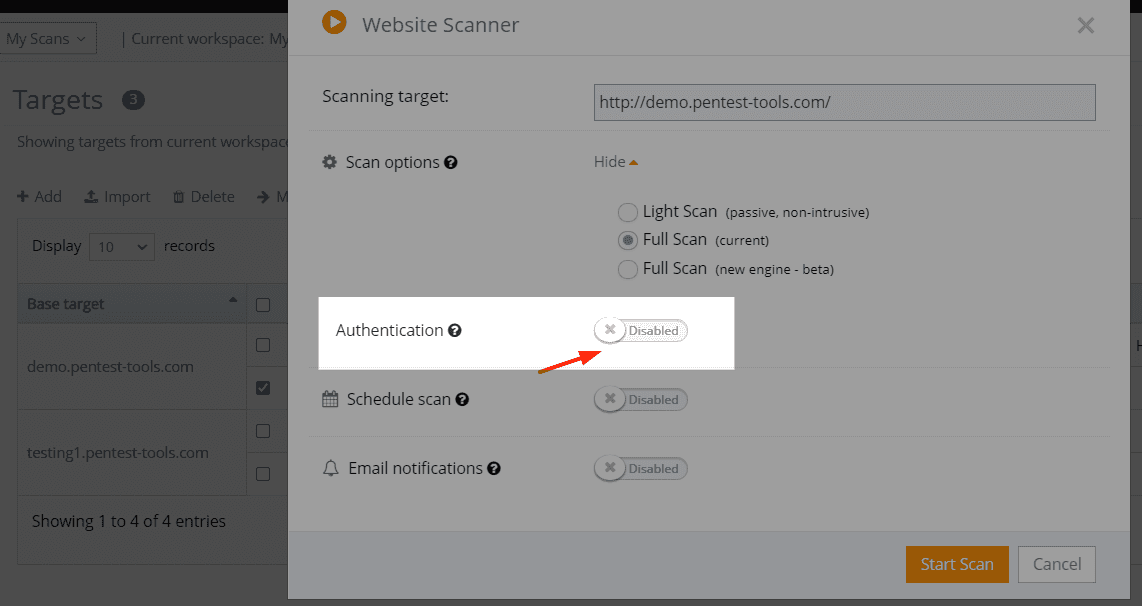
Here’s some good news: you can now enable – and configure – authentication options for the Website Scanner tool from the Targets page.
Go to Targets, select a specific one, click on Scan with Tool, and choose the Website Scanner. Enabling Authentication gives you all the options you need!
No more back and forth! (Keep that feedback coming – we’re all ears!)
5. The SMBGhost and GhostCat scanners – now included in the Network Vulnerability Scanner with OpenVAS
SMBGhost and GhostCat aren’t going anywhere anytime soon, but we’ve decided to integrate their functionalities into our Network Vulnerability Scanner with OpenVAS.
Need to check if your system is affected by one of these specific vulnerabilities? Choose the Full Scan option from the Network Vulnerability Scanner with OpenVAS and see them in your Findings.
Try these platform improvements and see how they improve your security testing workflow!


